If you’re a fan of Hello Kitty and enjoy crocheting, combining the two can result in an adorable and eye-catching accessory—the Crochet Hello Kitty Bag.
In this article, we will explore the joy of crafting your very own Hello Kitty bag through the art of crochet. Get ready to embark on a delightful journey that merges your love for crocheting and the iconic Hello Kitty character.
Cute Hello Kitty Bag Crochet Pattern
Indulge in the art of crochet and embark on a delightful journey of creativity as you weave yarn into an enchanting Hello Kitty bag, a captivating accessory that radiates cuteness and captures the admiration of onlookers with its whimsical charm.
If you are a fan of crochet bags and the crochet hello kitty, then you will have a blast with the hello kitty bag crochet pattern collection.
Best Yarn for crochet hello kitty bags
When it comes to choosing the best yarn for crocheting Hello Kitty bags, it’s essential to opt for yarn that not only matches Hello Kitty’s iconic colours but also offers the desired softness and durability for a functional and eye-catching accessory. Here are a few yarn options that are commonly used and highly recommended for crocheting Hello Kitty bags:
Acrylic Yarn: Acrylic yarn is a popular choice for crocheting Hello Kitty bags due to its affordability, wide range of vibrant colors, and ease of care. It is known for its durability, making it suitable for everyday use. Acrylic yarn also provides excellent stitch definition, allowing the intricate details of Hello Kitty’s features to shine.
Cotton Yarn: If you prefer a more natural fibre option, cotton yarn is an excellent choice for crocheting Hello Kitty bags. It offers a soft and smooth texture, ensuring comfort and breathability. Cotton yarn is great for creating lightweight and summer-friendly bags, making it ideal for Hello Kitty enthusiasts who desire a bag for warmer weather.
Worsted Weight Yarn: Worsted weight yarn is a versatile option that strikes a balance between thickness and flexibility. It provides enough structure to create a sturdy Hello Kitty bag while still allowing for intricate stitch work. With a wide range of colours available in worsted weight yarn, you can easily find the perfect shades to bring Hello Kitty to life.
Soft and Fuzzy Yarn: For those seeking an extra touch of coziness and fluffiness, soft and fuzzy yarns, such as mohair or chenille, can add a delightful texture to your Hello Kitty bag. These yarns create a plush finish that enhances the cuteness factor of your crochet creation.
Remember to consider the weight, texture, and overall look you desire for your Hello Kitty crochet bag. It’s always a good idea to try different yarn options and swatch a few samples before committing to a particular yarn choice. Ultimately, selecting the best yarn for your crochet Hello Kitty bag will depend on your personal preferences and the specific qualities you want your finished bag to possess.
Can beginners crochet a hello kitty bag?
Yes, beginners can absolutely crochet a Hello Kitty bag! While it may seem like a complex project, there are patterns available specifically designed for beginners with detailed instructions and step-by-step guidance. With a little patience, practice, and a willingness to learn, even those new to crochet can successfully create an adorable Hello Kitty bag.
How to crochet a hello kitty bag
To get started, it’s recommended to choose a beginner-friendly crochet pattern that provides clear instructions, preferably with illustrations or video tutorials. These patterns often use basic stitches, such as single crochet, double crochet, and chains, which are foundational stitches that beginners can easily learn and practice.
It’s also helpful to have the right tools and materials, such as appropriate-sized crochet hooks and yarn in the designated colors for Hello Kitty. Remember to start with a yarn weight that you feel comfortable working with, as different yarn weights may require different hook sizes.
While crocheting, take your time and go at your own pace. Beginners may find it beneficial to practice the stitches and techniques on smaller swatches before diving into the main project. As you gain confidence and familiarity with the stitches, you can progress to creating the different components of the Hello Kitty bag.
If you encounter any challenges or have questions along the way, there are various online resources, crochet communities, and tutorials available to provide additional guidance and support. Remember that learning a new skill takes time, so be patient and enjoy the process of creating your very own Hello Kitty bag.
With practice and determination, even the absolute beginners can create beautiful crochet Hello Kitty bags that showcase their newfound crochet skills and bring joy to both the maker and those who see the finished creation.
Stitches & Techniques To Crochet Hello Kitty Bags
Crocheting a Hello Kitty bag involves several stitches and techniques to bring the adorable character to life. Here are some key stitches and techniques commonly used in Hello Kitty bag patterns:
- Single Crochet (SC): The single crochet stitch is the most basic stitch in crochet. It creates a dense and tight fabric, making it ideal for creating sturdy bag structures.
- Double Crochet (DC): The double crochet stitch is taller than the single crochet and works up quickly. It is often used for larger sections of the bag or when you want a slightly looser fabric.
- Chain (CH): The chain stitch is the foundation of crochet. It is used to create the starting base for each row or round and also forms spaces for creating buttonholes or attaching embellishments.
- Slip Stitch (SL ST): The slip stitch is a technique used to join rounds, create edges, or move across stitches without adding height. It is commonly used for finishing rounds or creating smooth transitions.
- Magic Ring (or Magic Circle): The magic ring technique is used to start crocheting in the round without leaving a hole in the center. It is often employed when creating Hello Kitty’s facial features or other circular elements.
- Increasing and Decreasing: Increasing is done by working multiple stitches in the same stitch, while decreasing is done by combining stitches together. These techniques help shape the bag and create curves or tapering where needed.
- Colour Changes: Crocheting a Hello Kitty bag involves working with different colours to bring out the character’s signature appearance. Colour changes can be achieved by simply dropping one colour and picking up another at the desired point in the pattern.
- Embroidery: Embroidery techniques, such as surface slip stitches, are used to add details like Hello Kitty’s whiskers, nose, and mouth. These details contribute to the bag’s final look and capture the essence of the character.
Remember to consult the specific Hello Kitty bag pattern you are using for the exact stitch counts, instructions, and any additional techniques required.
By mastering these stitches and techniques, you’ll be well-equipped to crochet a charming Hello Kitty bag that reflects the iconic features of this beloved character. Enjoy the process and have fun creating your Hello Kitty masterpiece!
Easy Crochet Hello Kitty Bag Patterns
1. Cute Crochet Hello Kitty Bag Pattern
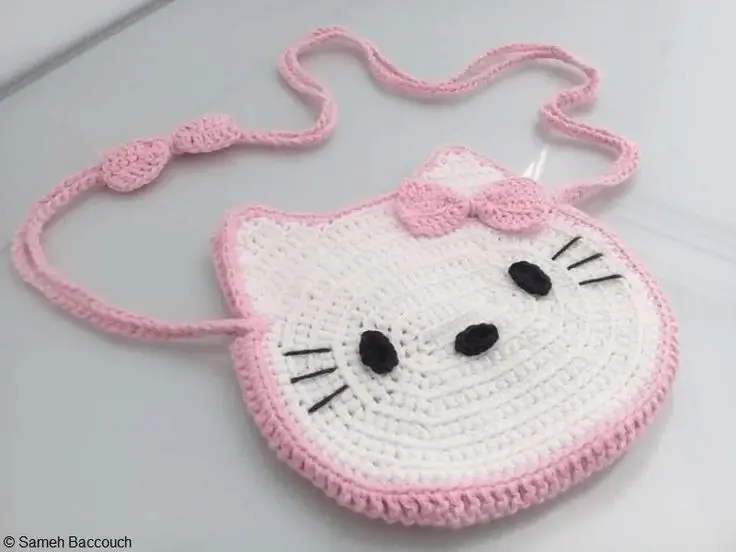
For the paid PDF pattern, head HERE.
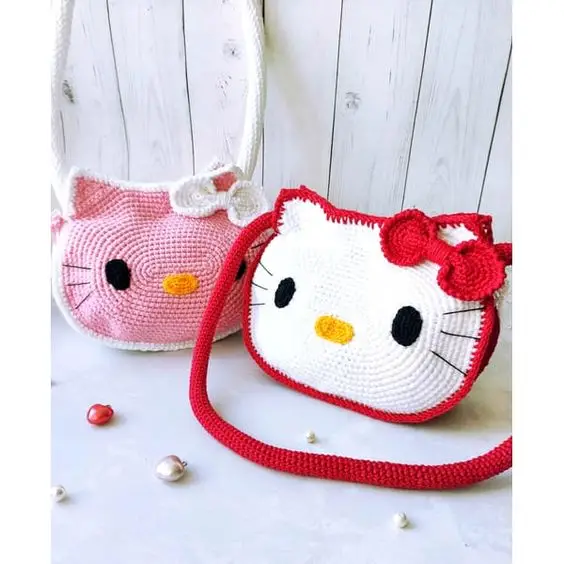
2. Crochet Lovely Hello Kitty Bag

This cutie little hello kitty purse can be accessed HERE for free.
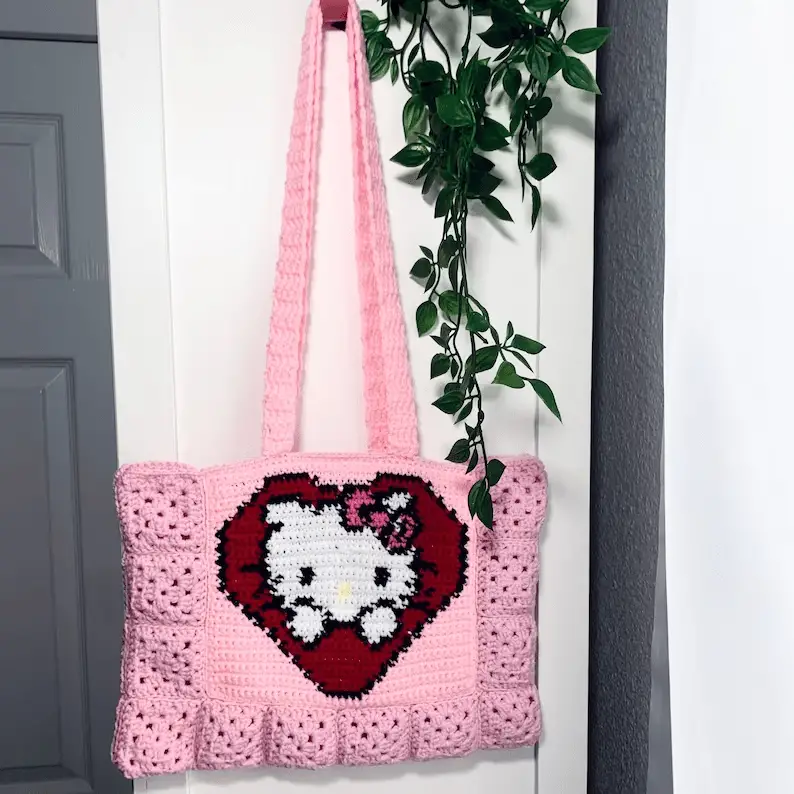
3. Hello Kitty Crochet Bag
Make this cutie little girls bag at a small price using the pattern HERE.
4. Crochet hello kitty bag
This is nt a pattern but rather the bag, when i saw it i could not resist sharing. Grab it HERE.
5. Hello Kitty Creochet Bag Pattern
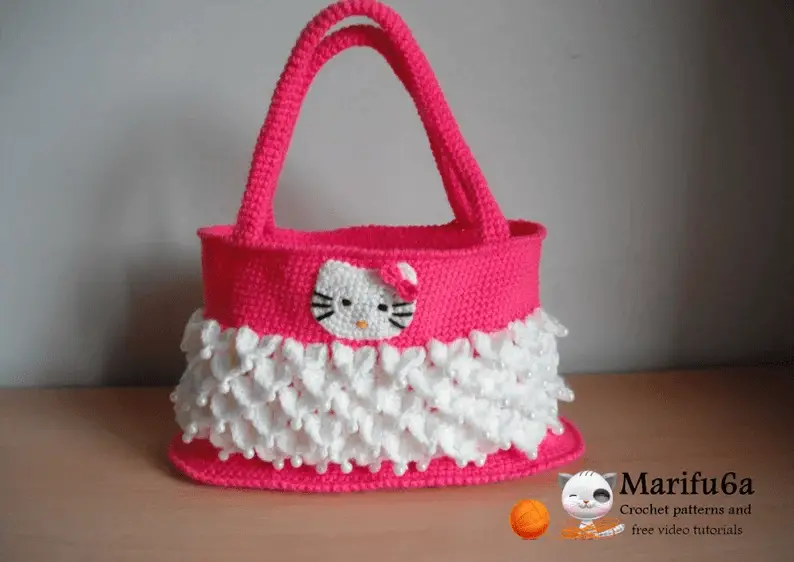
Here is another crochet hello kitty bag pattern. Grab it HERE.
Adding Lining to your crochet hello kitty bag
Adding a lining to your crochet Hello Kitty bag is a great way to give it a polished and professional finish. The lining provides stability, helps retain the bag’s shape, and prevents small items from poking through the crochet stitches. Here’s a step-by-step guide on how to add a lining to your Hello Kitty bag:
- Measure and Cut the Fabric: Start by measuring the inside dimensions of your crocheted Hello Kitty bag. Using these measurements, cut a piece of fabric for the lining. You may choose a cotton fabric in a colour that complements the bag or opt for a patterned fabric that adds a unique touch.
- Prepare the Fabric: Once you’ve cut the fabric, fold it in half with the right sides facing inward. Pin the sides together, leaving the top open for now. If desired, you can iron the fabric to remove any wrinkles or creases.
- Sew the Sides: Using a sewing machine or a needle and thread, sew the sides of the fabric together, leaving a small seam allowance. Back stitch at the beginning and end to secure the stitches. This creates a pouch-like shape for the lining.
- Turn the Lining Right Side Out: Gently turn the fabric right side out, so the seams are now on the inside. Use a blunt object, such as a knitting needle or the handle of a spoon, to push out the corners and create clean edges.
- Insert the Lining: Place the fabric lining inside your crochet Hello Kitty bag, aligning the top edges. Adjust the lining so it fits snugly within the bag, with the excess fabric folded over the top edge.
- Pin and Sew the Lining: Carefully pin the top edges of the lining to the crochet stitches of the bag. This will hold the lining in place and prevent it from shifting. Using a needle and thread that matches the lining color, hand sew the top edge of the lining to the crochet stitches. Make small, discreet stitches along the edge, ensuring the lining is securely attached.
- Finishing Touches: Once the lining is attached, trim any excess fabric if necessary. You may also choose to add additional pockets or compartments to the lining if desired. This can be done by sewing fabric dividers onto the lining fabric before inserting it into the bag.
By adding a lining to your crochet Hello Kitty bag, you’ll enhance its overall functionality and provide a neat and professional appearance. The lining will protect your belongings and give your bag a finished look that is both stylish and practical. Enjoy your beautifully lined crochet Hello Kitty bag!
How to wash a handmade crochet hello kitty bag
When it comes to washing a handmade crochet Hello Kitty bag, it’s essential to handle it with care to preserve its shape and integrity. Here are some general guidelines to follow:
- Read Care Instructions: Before washing your crochet Hello Kitty bag, check for any specific care instructions provided by the yarn manufacturer or the pattern designer. If there are specific recommendations, follow them accordingly.
- Spot Cleaning: If your bag has minor stains or dirt, it’s best to spot clean it instead of fully submerging it in water. Gently dab the affected area with a clean, damp cloth and a mild detergent or soap suitable for delicate fabrics. Be careful not to scrub vigorously or rub the crochet stitches too forcefully.
- Hand Washing: If your crochet Hello Kitty bag requires a thorough cleaning, hand washing is usually the safest method. Fill a basin or sink with lukewarm water and add a gentle detergent suitable for delicate items. Submerge the bag in the water and gently agitate it to distribute the detergent. Let it soak for a few minutes.
- Rinse Carefully: After soaking, drain the soapy water and refill the basin or sink with clean lukewarm water. Gently swish the bag around to remove any remaining soap. Repeat this rinsing process if necessary until the water runs clear.
- Press Out Excess Water: Once the bag is thoroughly rinsed, avoid wringing or twisting it, as this can distort its shape. Instead, gently press the bag against the sides of the sink or basin to squeeze out excess water. Be careful not to apply too much pressure.
- Absorb Water with Towels: Lay a clean towel on a flat surface and place the crochet Hello Kitty bag on top. Roll the towel up with the bag inside, applying gentle pressure to absorb more water. Repeat this step with dry towels if needed until the bag feels damp but not dripping wet.
- Reshape and Dry Flat: Carefully reshape the bag to its original form, smoothing out any wrinkles or misshapen areas. Place it on a clean, dry towel or blocking mat and allow it to air dry completely in a well-ventilated area, away from direct sunlight or heat sources. Avoid hanging the bag to dry, as this can stretch the crochet stitches.
- Blocking (If Necessary): If your bag requires reshaping or stretching, you can perform a gentle blocking process while it is damp. Use rustproof pins or blocking wires to pin the bag into the desired shape, taking care not to pull the stitches too tightly. Leave it in this position until completely dry.
- Final Touches: Once the crochet Hello Kitty bag is dry, check for any loose threads or embellishments that may need reinforcement. Secure them with a needle and matching yarn if necessary.
Remember, the specific yarn used and any additional decorations on the crochet hello kitty bag may influence the washing process, so always refer to any care instructions provided by the yarn manufacturer or pattern designer.
By following these guidelines, you can help maintain the beauty and quality of your handmade crochet Hello Kitty bag for years to come.
I hope your crochet hello kitty bag makes you happy!