
When it comes to free knitting sweater patterns, there really is not a lot out there. Which i find strange because there is a ton of free crochet sweaters on the internet. But you are not here for that.
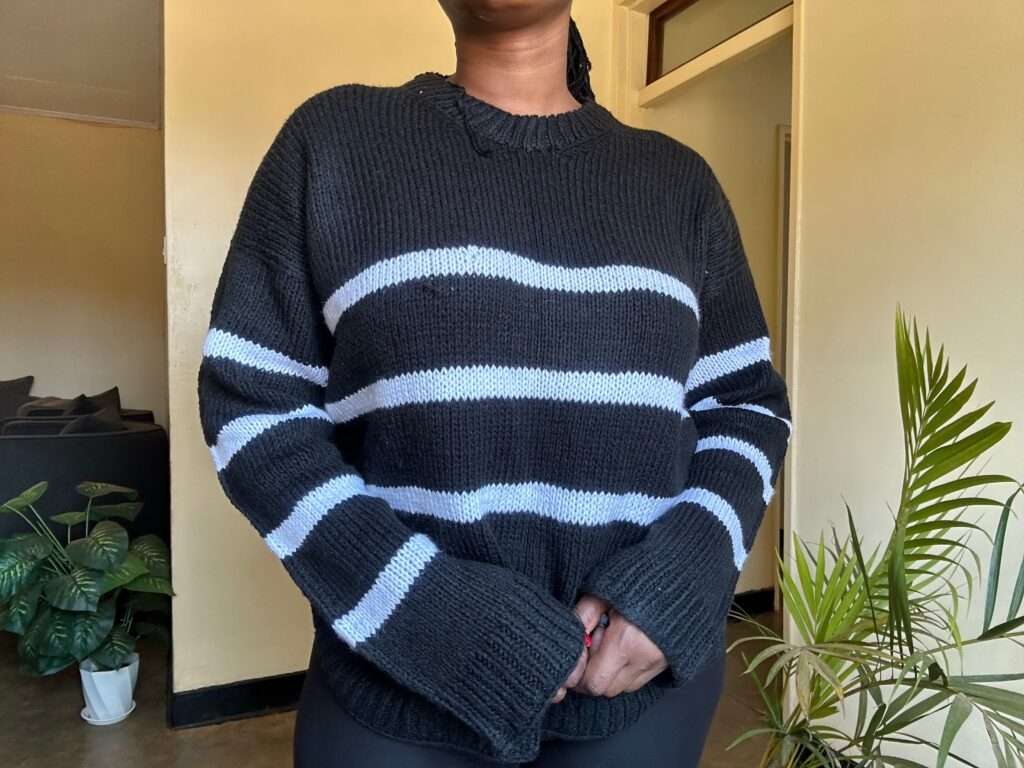
I have seen a lot of stripped and oversized knit sweater patterns but never one that really stood out to me. So when you knit, you do what must be done. You knit your own sweater.

The hours that went into this knit sweater pattern is crazy. I knit the entire body, and that is from the neck to the bottom band and realized i did not like it then started over again.
What didn’t i like? Well the arm holes were huuuuuge, as much as i wanted an oversized knit sweater, it was just too too big for me. I am not scared of starting over so i did.


Free Knitting Sweater Pattern
I love sharing some free knitting sweater patterns together with some free crochet patterns when i am not teaching how to crochet on SkillShare and Udemy, so check those out if you have been thinking about picking up a crochet hook.
I recently made a knit cropped cardigan by accident. It is cropped because i got lazy and did not see it to the full length. Also because i believed my acrylic yarn would relax after blocking. It did not.
Prefer the Ad-Free Knitting Sweater Pattern?
I understand, we can’t all ignore adverts, but i need them to earn a little something from the patterns i share. But if you cannot stand them that much, you can purchase the pattern on Ravelry, LoveCrafts or Ribblr and that will also be a great way of supporting my work.
Can beginners Knit the Faith Sweater?
Yes! Listen, i have never been that beginner that likes to work on the easy stuff. And one thing i like to do is to pay attention to every detail and make sure i understand what they are asking me to do.
If you know you can follow the instructions and know all the techniques it takes to make this knitting sweater pattern then go ahead and knit it!
About the Faith Free Knitting Sweater Pattern
SIZES: XS(S,M,L,XL,2X,L,3XL)
GAUGE: 18sts in 25rows= 10 x 10 cm [4 x 4 inches] in stockinette stitch
MATERIALS: light worsted weight yarn, yarn needle, stitch markers scissors, 5.5mm & 4.5mm needles measuring tape
YARDS: main color: 345(460,460,690,850, 920, 1050)
White: 230(230,230,345,345,460,460)
LEVEL: Intermediate Beginner
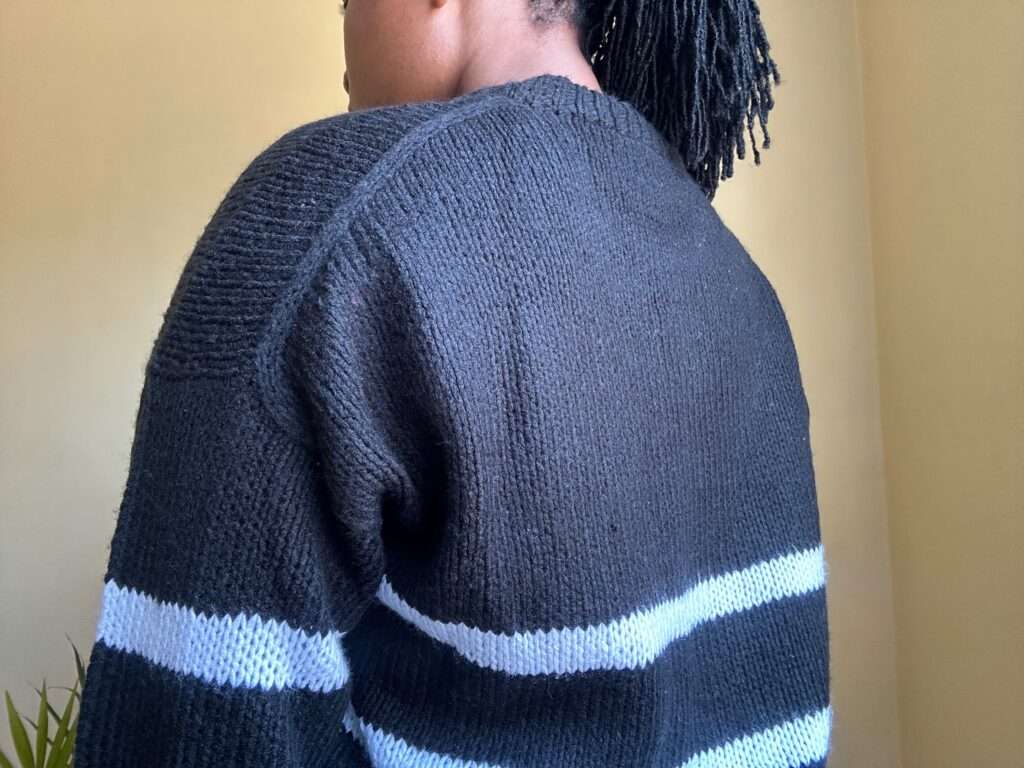
The knitted Sweater is worked from the top down. First the top part of the back yoke is worked with increases, then the shoulders are worked from stitches that are picked up and knitted along the slanting sides at the back yoke.
Then the front and back are are connected and worked in the round on
circular needles and the sleeves are worked in the round on double-pointed needles or on a
circular needle using the Magic Loop technique.
At the end a folded neck is worked (optional). The knit Sweater is worked in stripes from the middle of the yoke and downwards.
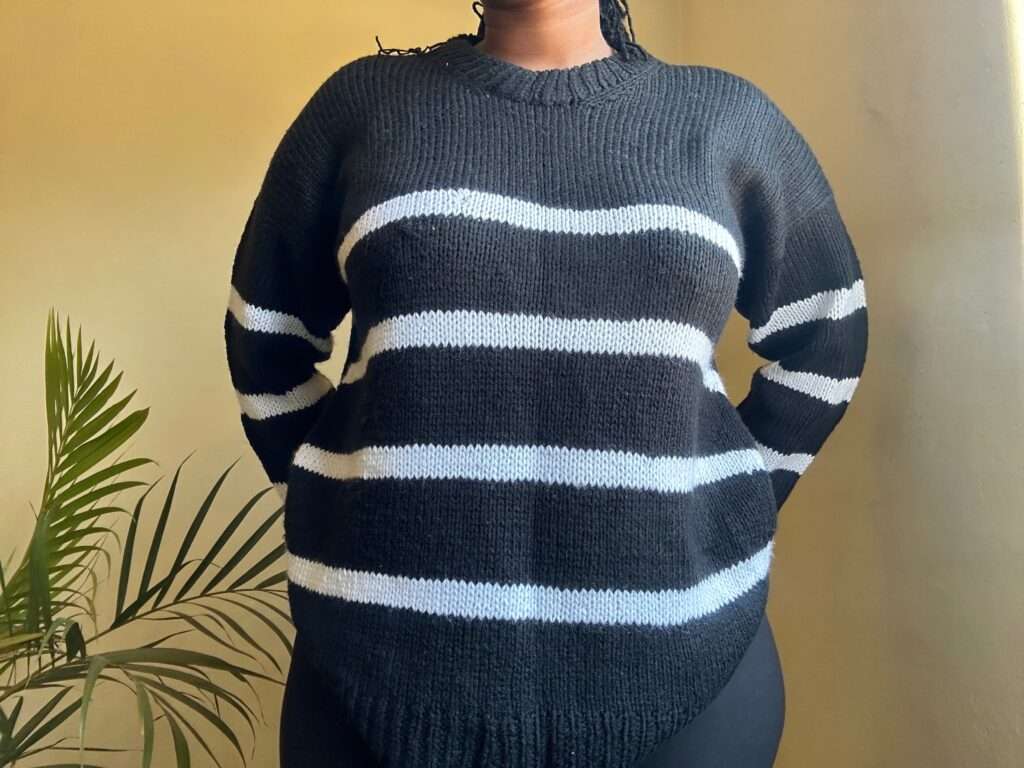
Size Guide
The knit sweater is designed to have approx. 7″[17.78cm] of positive ease for all sizes the sizes
XS (S) M (L) XL (2XL) 3XL are designed to fit bust circumference of 80-85 (85-90) 90-95
(95-100) 100-110 (110-120) 120-130 cm or [31½ 33½ (33½-35½) 35½-37½ (37½-39½)
39½-43¼ (43¼-47¼) 47¼-51¼] inches.
Measure yourself before beginning the project to determine the size you need to make for
yourself
About Increases
Increases are worked so they are either slanted to the right M1R or to the left M1L
M1R:
From the RS: Insert the left needle under the strand that runs between two stitches from back
to front, then knit this strand.
From the WS: Insert the left needle under the strand that runs between two stitches from
back to
front, then purl this strand.
M1L:
From the RS: Insert the left needle under the strand that runs between two stitches from
front to back,
then knit this strand through the back loop (twisted).
From the WS: Insert the left needle under the strand that runs between two stitches from
front to back, then purl this strand through the back loop (twisted).
About Decreases
We work a decrease to either slant to the right (k2tog) or to the left (skp/ssk)
K2tog: Knit 2 stitches together.
Skp: Slip 2 stitches knit-wise, k1, pass the slipped stitch over the knitted stitch
The Faith Sweater Free Knitting Pattern
Back Yoke
We begin by working the back yoke. After casting on the number of stitches needed for your
size, increases will be made for the back of the neck.
Cast on 26 (30) 30 (36) 42 (48) 54 sts on a 5.5 mm [US9] / 60 cm [24 inches] circular needle.
Set up row: Purl across 1 row. The next row is a RS row.
Work back and forth with increases for the back yoke as follows:
Row 1 (RS): K3, M1L, knit to the last 3 sts on the needle, M1R, k3. (2 sts have been increased)
Row 2 (WS): P3, M1R, purl to the last 3 sts on the needle, M1L, p3. (2 sts have been
increased)
Repeat row 1 and 2 for 26 (30) 30 (36) 42 (48) 54 rows.
There are now a total of 78 (90) 90 (108) 126 (144) 162 stitches on the needle We are done increasing for the back. Now knit in stockinet for 26 (30) 30 (36) 42 (48) 54 rows.
Break yarn and put the stitches on hold while the shoulders are worked.
Left Shoulder
RS facing and with the 5.5 mm [US7] / 40 cm [16 inches] circular needle, pick up the 27 (31)
31 (37) 43 (49) 55sts along the slanting side at the back yoke (this is the equivalent to picking
up 1 stitch in every stitch along the entire slanting section of the back yoke where the
increases are).
The direction for picking up and knitting stitches is from the neck and towards the armhole edge.
Set up row : purl all stitches
Work back and forth as follows:
Row 1 (RS): Knit across.
Row 2 (WS): Purl across.
Repeat these two rows till you have a total of 14(14,14,20,20,20,20)
Row 15 (21): K2, M1R, knit all stitches
Row 16 (22) : Purl all stitches
Row17 (23) : K2, M1R, knit all stitches.
Repeat these two rows till you have increased a total of 10(10,10,12,14,14,16) . You should
have 37(41) 41 (51) 57(63) 71 stitches on your needle.
After working the increases, put the stitches on hold
Right Shoulder
RS facing and with the 5.5 mm [US9] / 40 cm [16 inches] circular needle, pick up the 27 (31)
31 (37) 43 (49) 55 sts furthest to the right along the slanting side at the back yoke (this is the
equivalent to picking up 1 stitch in every stitch along the entire slanting section of the back
yoke where the increases are).
The direction for picking up and knitting stitches is from the armhole edge and towards the neck.
Set up row: Purl across 1 row
Work back and forth as follows:
Row 1 (RS): Knit across.
Row 2 (WS): Purl across.
Repeat these two rows till you have a total of 14(14,14,20,20,20,20)
Row 15 (21): K till last 2 sts, M1L, K2
Row 16 (22) 😛 all sts
Row 17 (23): K till last 2 sts, M1L, K2,
Repeat these two rows till you have increased a total of 10(10,10,12,14,14,16) . You should have 37(41) 41 (51) 57(63) 71 stitches on your needle.
Do not put stitches on hold.
Row 34 (34,34,44,44,44,52): K all sts, Cast on: 6,10,10,12,14,20,22, K left shoulder.
We have now joined the front. Now knit the front in stockinet till the number of rows on the
front match the number of rows for the back.
Knit till row 52(60,60,72,84,96,108)
Now it is time to join the front and the back. We will work one more row in the main color
connecting the front of the sweater to the back of the sweater. pick up all the stitches of the
back and knit to join in the round.
From now on you start and end the round at the right shoulder arm hole. Place a marker to
indicate the start and end of your round.
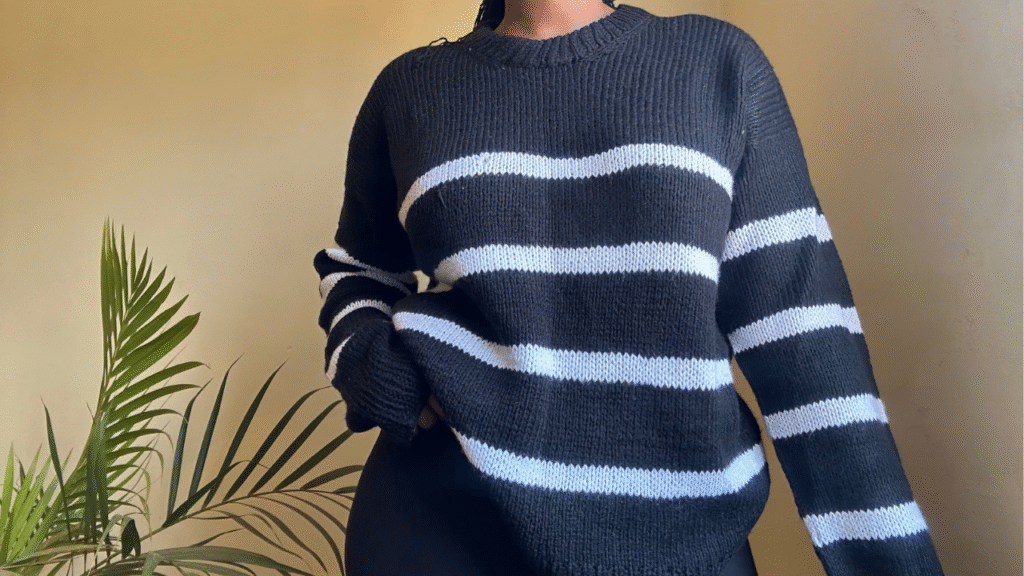
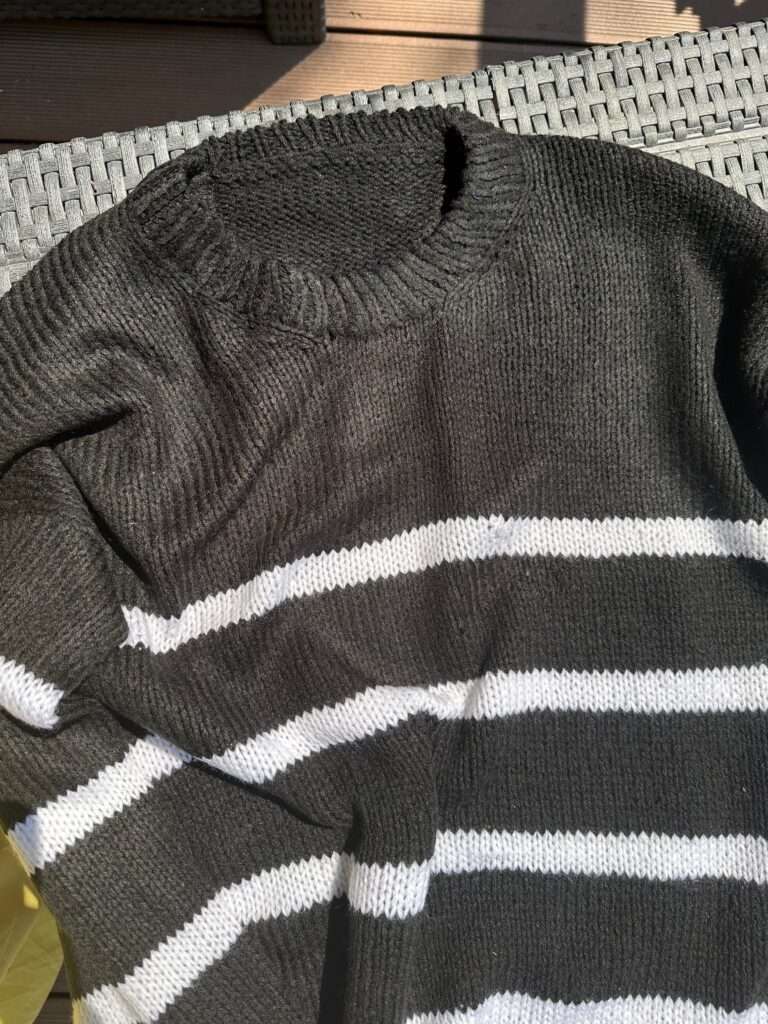
Working The Stripes
The stripes are worked as follows: 5 rows of primary color followed by 15 rows of main color. Be sure to work the stripes jog-less.
Work till your sweater reaches your desired length then switch to 4.5mm needles and work a 1X1 rib.
Collar
With the 4.5mm needles.
Working a folded collar is completely optional. We begin picking up stitches from the back
of the beck where the right shoulder stitches were picked. PU all stitches for the back, and 2
for every 3 stitches for the left shoulder, then all the neck cast on stitches, then 2 for every 3
stitches for the right shoulder.
Place a marker at the end to know the start and end of the round. Work a 1X1 rib.
If you are doing a folded collar, double the number of rows you want for the collar height
and add 2 rows for folding then cast off. Sew to the base of the stitches we picked up for the
collar with good tension following the pick up 2 for every 3 stitches method so that the collar
is neatly connected.
SLEEVES
The sleeves are worked in the round on 5.5 mm [US9] double-pointed needles or a long
circular needle using the Magic Loop technique.
Pick up 2 stitches for every 3 rows. There are now a total of 52 (60)
60 (72) 84 (96) 108 sts on the needles.
Work 15 rows in main color then 4 rows in primary color, on row 5 of the primary color,
make your first decrease: K1, k2 tog, K all sts till 3 remain, SSK, K last stitch.
From now on you will decrease in every 10 round for all sizes till your sleeve reaches your
desired length.
Switch to a 4.5mm needle and work a 1X1 rib, cast off and weave in the ends. Repeat for the
other sleeve.
Weave in all ends
Block the sweater!
When you are done please post a picture to Instagram with the hashtag #faithsweater and tag
me @sit_n_crochet
love this free knitting sweater pattern? Be sur to share the post!