
This pattern was long awaited for. I was dying to share this Free crochet pattern as i recently shared the printable pattern on Facebook and Instagram and a lot of you loved it, so i thought hey, it’s almost Christmas soooooo, why not right??
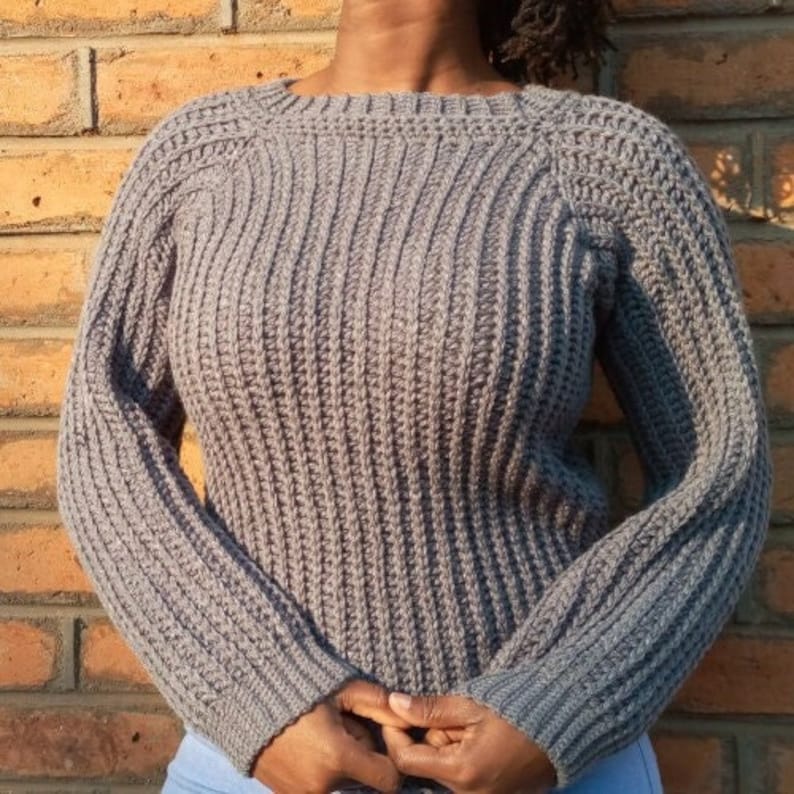
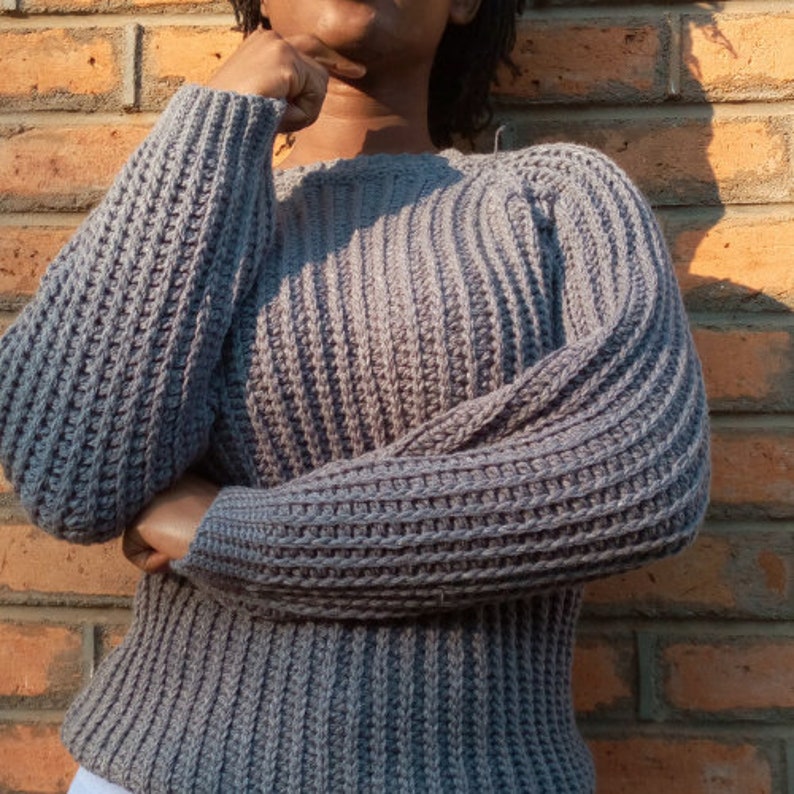
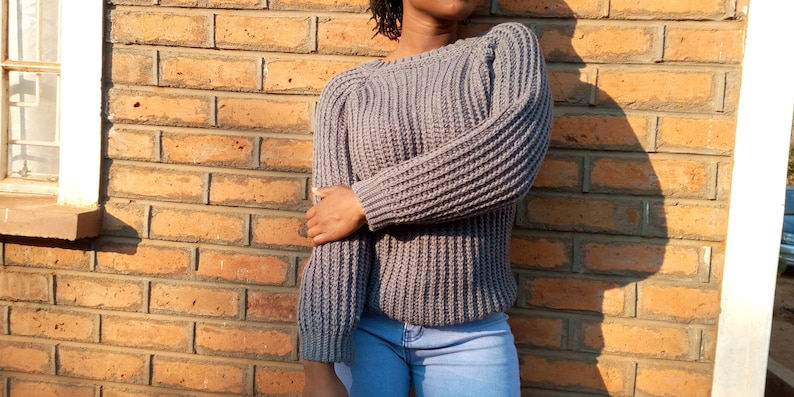
My favorite thing about this crochet sweater is that it does not look crochet at first ( unless it’s just me), the knit vibes it gives makes you believe you could work a pair of knits LOL!
I had a great time working on this piece as i was excited to see how it would fit.
If i am to make it again, i would make the arms a bit longer as these do not reach the wrists. So take note as you are crocheting. Feel free to add on a few stitches to the arms
Good to know
The pattern can be adjusted to any size of your choice and we explain how in the pattern.
The pattern for the sweater is worked from bottom to the top and not side to side. If you do not have the required size yarn or hook you can use measurement to achieve your desired size which will be explained.
The pattern is worked in the back loop only. The sweater is worked in half double crochet and slip stich.
Measurements
Finished work Measurement for size Small
Length : 22 inches
Wide: 15.5 inches
Sleeves: 21inches
Gauge: 16 stitches in 14 rows 4”X4”
Materials
5.00 mm Hook
● 3.00mm hook
● Stitch marker
● Yarn
● Measuring tape
● Scissors
● Darning needle
amount of yarn needed
1. 5 balls of 100g yarn suitable for 5.00 mm
hook for sizes XS & S,
2. 7 balls for size M,
3. 9 balls for L,
4. 11 balls for XL,
5. 13 balls for 2XL,
6. 15 balls for 3XL,
7. 17 balls for 4XL,
terminology
US
Stitch Library
-HDC- Half Double crochet
-Slst- Slip Stitch
-Ch- Chain
-Bl-Backloop
-Incr- Increase
-Decr- Decrease
-St- Stitches
-Rep- Repeat
Other patterns/ Articles you may like
pattern
Underarm
Begin by estimating how long you want
your sweater to be by measuring from
your underarm to where you want the
sweater to reach
Ch 46(51,51,61,61,71,71,81) using a
3mm hook. sc into the first 10st, place a
stitch marker on the 10th st. switch to a
5mm hook and place hdc in remaining chs
leaving the last ch. In the last ch place 2
hdc to incr. Ch 2 and turn
Slst in second st from hook to incr, then
(back loop only) , slst in remaining st till
the stitch marker, back loop sc in the last
10. Ch 1 and turn.
Sc in the first ten, hdc the remaining st
increasing in the last ch. Repeat this
making sure you hdc while working up
and slst while working down, making sure
to increase at the top of the work till row
16(20,24,28,32,36,40,44) or increase till
the top of the work reaches the tip of
your collarbone. Place a stitch marker on
the lastincrease row.
Midsection
For the middle portion of the sweater,
there will be no more increases for this
section. The middle section should go
from one collarbone to the other
collarbone.
Work the middle section till rows
14(18,22,26,30,34,38,42). Place a stitch
marker on the last row of the middle
portion.
other uderarm
In his section, we begin to decrease
so the work mirrors the beginning underarm portion. Since we were increasing with
2hdc and slst in the same st, we will
decrease 2st together. Start the row as
normal with 10 sc, hdc as normal leaving
the last 2 st at the top. Place a decrease in
the last 2 st
Decrease the same amount of rows as
you increased. 16(20,24,28,32,36,40,44).
Ch1 and cut.
MAKE 2 for the front and the back.
Once both front and back panels are
done, place a row of SC on the top of your
work
Connect the 2 panels using your needle
on the sides.
Locating where your stitch markers are,
connect yarn to your 5mm hook and
connect on one corner with a stitch
marker, make a chain that is long enough
to go from your front collarbone to just
below your shoulder. See image below for
better understanding.
Make a chain of 12(14,16.18,20,22,22,22)
connect with a slst to the second panel
made sc to the next stitch marker. After
teaching the stitch marker, ch
12(14,16,18,20,22,22,22) and slst to the
beginning panel, sc till you reach the
beginning chain. Connect with slst. Ch1
and work another row of sc over the chains
made.
After you have gone around with the sc row,
ch 6 and slst connect by slst to the next 2sc,
turn and slst in the 5st. Repeat till you have
a neck ribbing around the neck.
sleeves
Locate the underarm section of your
sweater and connect your yarn. Make a
ch of 66(71,71,81,81,91,91,91)Using a 3mm hook sc into the first 10 st,
place a stitch marker. Switch to a 5mm
hook and proceed with hdc till the end,
slst into the next 2 sc places around the
arm opening to connect the row. To turn
for the slst row, slst into one sc, place a
row of slst all the wat down till the stitch
marker where you will finish with sc.
Ch1 and with the 3mm hook, sc into the
first 10 st remember to work in the back
loop only, switch to the 5mm hook and
work your hdc till the opening of the
arm, connect by slst into 2 sc stitches, to
begin the slst row slst into 1 sc and work
down. Repeat this for the entire arm.
Do this for both sleeves.
Weave in the few yarns that are
sticking out.
Personally, i hate the sewing
pieces together portion so i
prefer to work the neck ribbing,
arm ribbing and sleeves all
together.
and just like that your crochet sweater is all done!!!
I hope you enjoyed making it and love the pattern.
Mistakes are inevitable, so where it does not make sense, ask in the comment section!
Until next time, Happy crafting!!!!