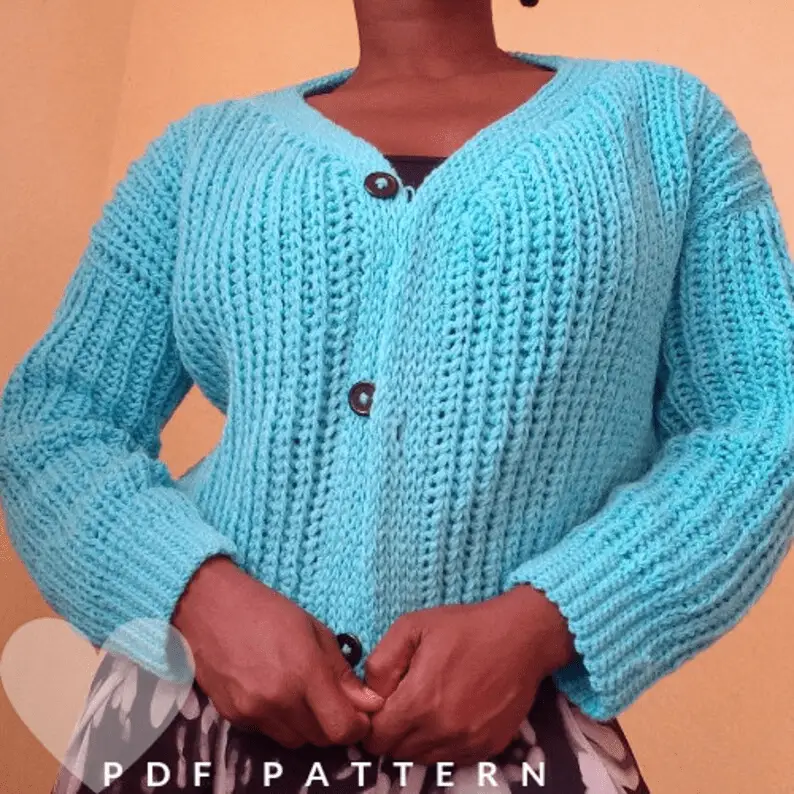
I am a sucker for crochet crop cardigans, this crochet cardigan free pattern will have you in love when you finish working on it. This crochet crop cardigan free patten was a gift i decided to give my readers when i had just created this website.
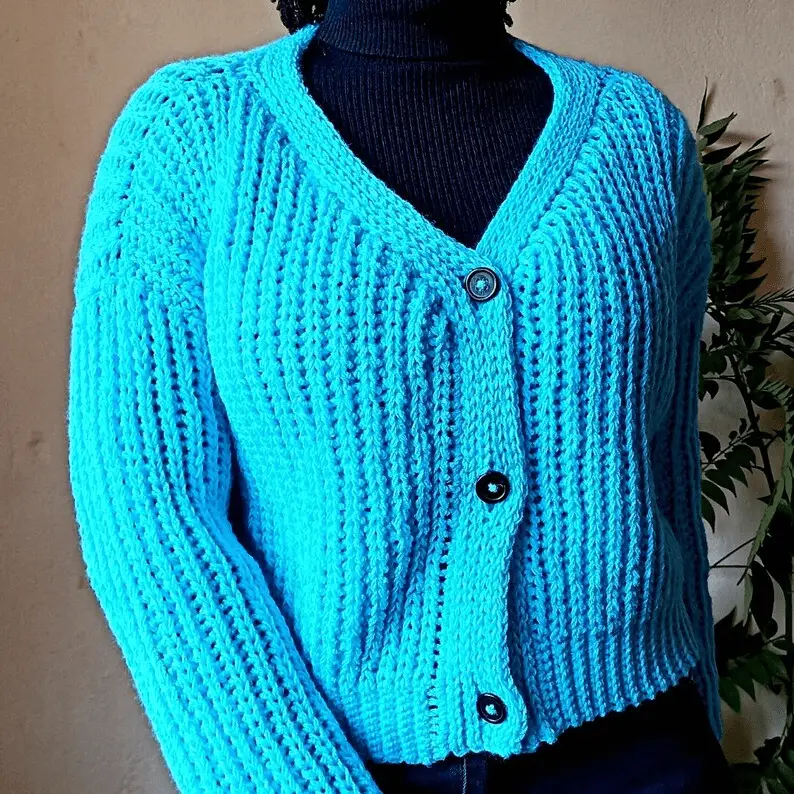
The buttons have to be my favourite part about this crochet crop cardigan free pattern, Did you know we have a FaceBook group, join us.
You can work from this free crochet crop cardigan pattern or purchase the downloadable AD-FREE PDF on Ravelry, Ribblr, Lovecrafts or My Shop.
Why not look classy while keeping warm with this cropped cardigan pattern?
The texture of this crochet crop cardigan free pattern is stunning as it gives the knit look yet as easy as they come…..once you master the half doublr slip stitch. My very personal favourite stitch LOL!
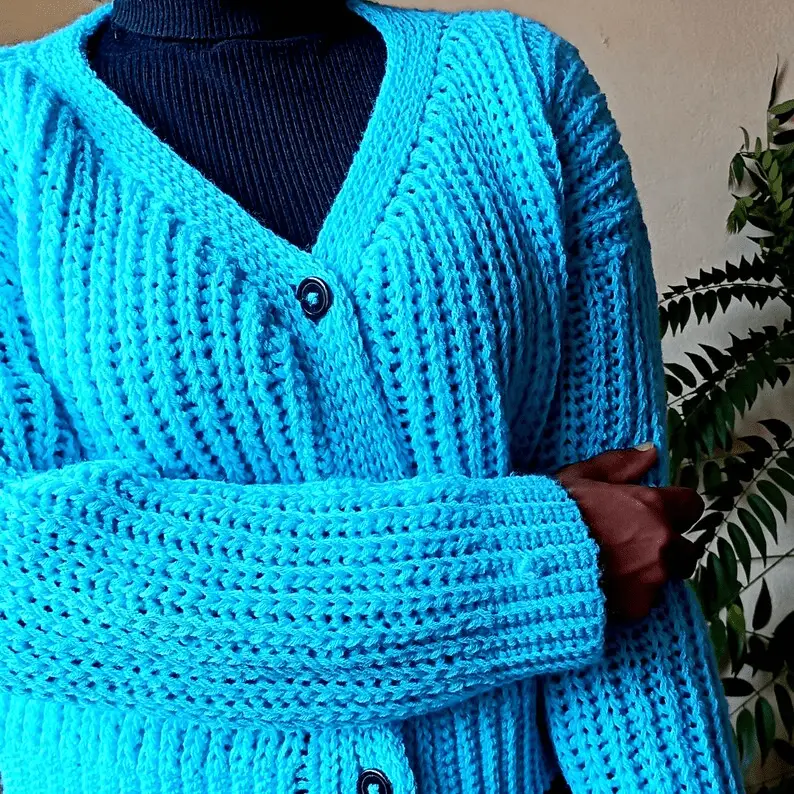
The crochet crop cardigan itself has minimal sewing and connecting which is a plus if you hate the connecting as much as i do which just makes it a joy to make.
I recently made this Crochet Rosella Sweater, and i fell in love. The plan is to have a corresponding crochet cardigan to the Rosella collection.
There are a collection of free crochet cardigans patterns while we are still on that topic, be sure to check them out, they are in order of my favorite, be sure to comment which one was your fave!
Blueberry Crochet crop cardigan Free pattern
Measurements
Finished work Measurement for size S
:Length : 16.7 inches
Wide: 23 inches
Gauge: 16 stitches in 14 rows 4”X4”
Materials
- 6.00 mm Hook for the main body of the cardigan
- 3.00 mm hook for the ribbing
- Stitch marker
- Yarn
- Measuring tape
- Scissors
- buttons
- Darning needle
Amount of yarn needed for all sizes
- 5 balls of 100g yarn suitable for 6.00 mm hook for sizes XS & S,
- 7 balls for size M,
- 9 balls for L,
- 11 balls for XL,
- 13 balls for 2XL,
- 15 balls for 3XL,
- 17 balls for 4XL,
Sizes
XS, (S, M, L, XL ,2XL ,3XL ,4XL)
Level of difficulty
Intermediate Beginner
terminology
US
Stitch library
-Hdslst- Half Double Slip Stitch
-Slst- Slip Stitch
– SC- Single Crochet
-Ch- Chain
-Bl-Backloop
-Incr- Increase
-Decr- Decrease
-St- Stitches
-Rep- Repeat
good to know
The pattern for the cardigan is worked from bottom to the top and not side to side.
The pattern is worked in the back loop only
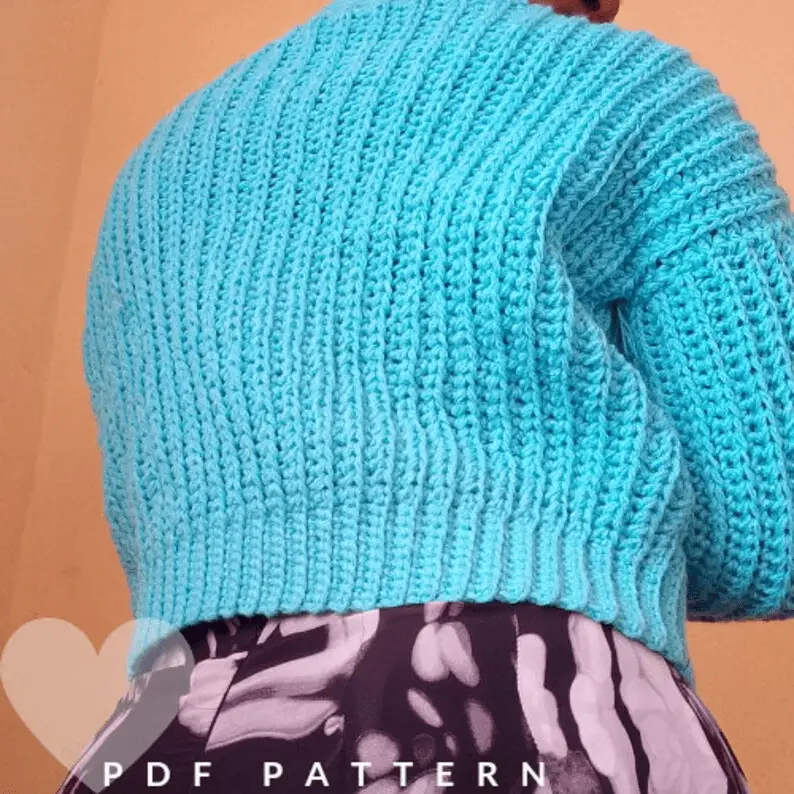
The sweater is worked using half double slip stitch and single crochet for the body and slip stitch for the colar .
construction
The Fall cardigan is crocheted in one panel, you will barely make use of your yarn needle which is time saving if you ask me LOL!!
We work the front panel moving to the shoulders where we leave an arm opening and continue to work the back portion then back to the front
The sewing to be done will be connecting the shoulders as the arms will be worked onto the cardigan. Simple right?
The inspiration to make this was my love for oversized comfy clothes, so i thought why not keep warm while at it? Also, it will look great in your closet for many seasons to come. And it feels just amazing to wear something your blessed hands made!!
The sizing guide follows size XS (S. M, L,XL, 2XL, 3XL, 4XL) E.g. ” Ch 41(41, 45, 45, 49, 49, 53, 53) mening chain 41 for XS, 41 for S, ch 45 for medium, ch 45 for large, ch 49 for extra large, ch 49 for 2 XL, ch 53 doe 3XL ns ch 53 for 4XL
Crochet cardigan Free Pattern
Begin by estimating how long you want your sweater to be by measuring from where you want your cardigan to reach to the mid of your breast.
Ch 41(41,45,45,49,49,53,53)
R1: using a 3mm hook sc into the first 10st, place a stitch marker on the 10th st. switch to a 6mm hook and place hdslst in remaining chs leaving the last ch. In the last ch place 2 hdslst to incr.
R2: Ch 2 and turn Hdslst in 2nd st from hook to incr, then (back loop only) , hdslst in remaining st till the stitch marker, back loop sc in the last 10. Ch 1 and turn.
Repeat rows 1-2 till row 16(20,26,32,38,44,50,56) then work 12(16,22,28,34,40,46,52) normal rows without increasing.

You would have ended at the bottom of your work. For the next row, leave 16(20,26,32,38,44,50,56) stitches at the top of your cardigan unworked because we will be chaining 16(20,26,32,38,44,50,56) for the back portion. See picture below for clarification.

For the back portion, work a total of 57(61,67,73,79,85,91,97) rows.
You should have ended at the bottom of your work. The next row will be starting the other front portion, work up as normal, leave 16(20,26,32,38,44,50,56) stitches at the top of your crochet cardigan unworked because we will be chaining 16(20,26,32,38,44,50,56) for the other front portion.
This portion will be similar to the first front portion we made.
Work 12(16,22,28,34,40,46,52) normal rows. Then we shall start decreasing so our work mirrors the other side of our sweater
Since we were increasing with 2hdslst in the same st, we will decrease 2 hdslst together at the top of our work only!
Decrease the same amount of rows as you increased. Decrease till row 16(20,26,32,38,44,50,56) then work. Ch1 and cut.

I really do not know why these pictures are coming up side down LOL, when i learn how to fix it, i sure will. But you get the idea right….?
Seeves
To make location of stitches easier, go around yout sleeve with a row of sc. 1 sc in each hdslst row.
Locate the underarm section of your cardigan and connect your yarn. Make a ch of 66(71,71,81,81,91,91,91) or at your desired length.
Using a 3mm hook sc into the first 10 st, place a stitch marker. Switch to a 6mm hook and proceed with hdslst till the end, slst into the next 1 sc spot around the arm opening to connect the row. To turn for the next row, slst into one sc, place a row of hdslst all the way down till the stitch marker where you will finish with 10 sc. Repeat this pattern all around till your sleeve is done. Sew to close.
Do this for both sleeves.
collar
Connect your yarn at the bottom of your work and place a row of sc all around where yout collar is to be.
At the end, ch1 and slst all the way around.
Work 5 rows of slst. On the 6th row, locate where you want your buttons to be, on the oppoite side create button holes. To do this, locate where you want the button hole to be and ch 2, skip 2 stitches and into the third continue with the slst.

Do this for the rest of the button holes and work a total of 5 extra rows making it 10 rows of slst for the collar, if desired, you can make it thicker by adding extra slst rows. At the end, ch1 and cut!!!! Sew in your buttons!!
Your crochet crop cardigan free pttern is done and ready to be worn. But first weave in all the stubborn stitcky ends and cut them off!!!
I hope you loved working on this as much as i did. Stay blessed, until next time,
Happy crfting!
Oh, and leave a comment below!