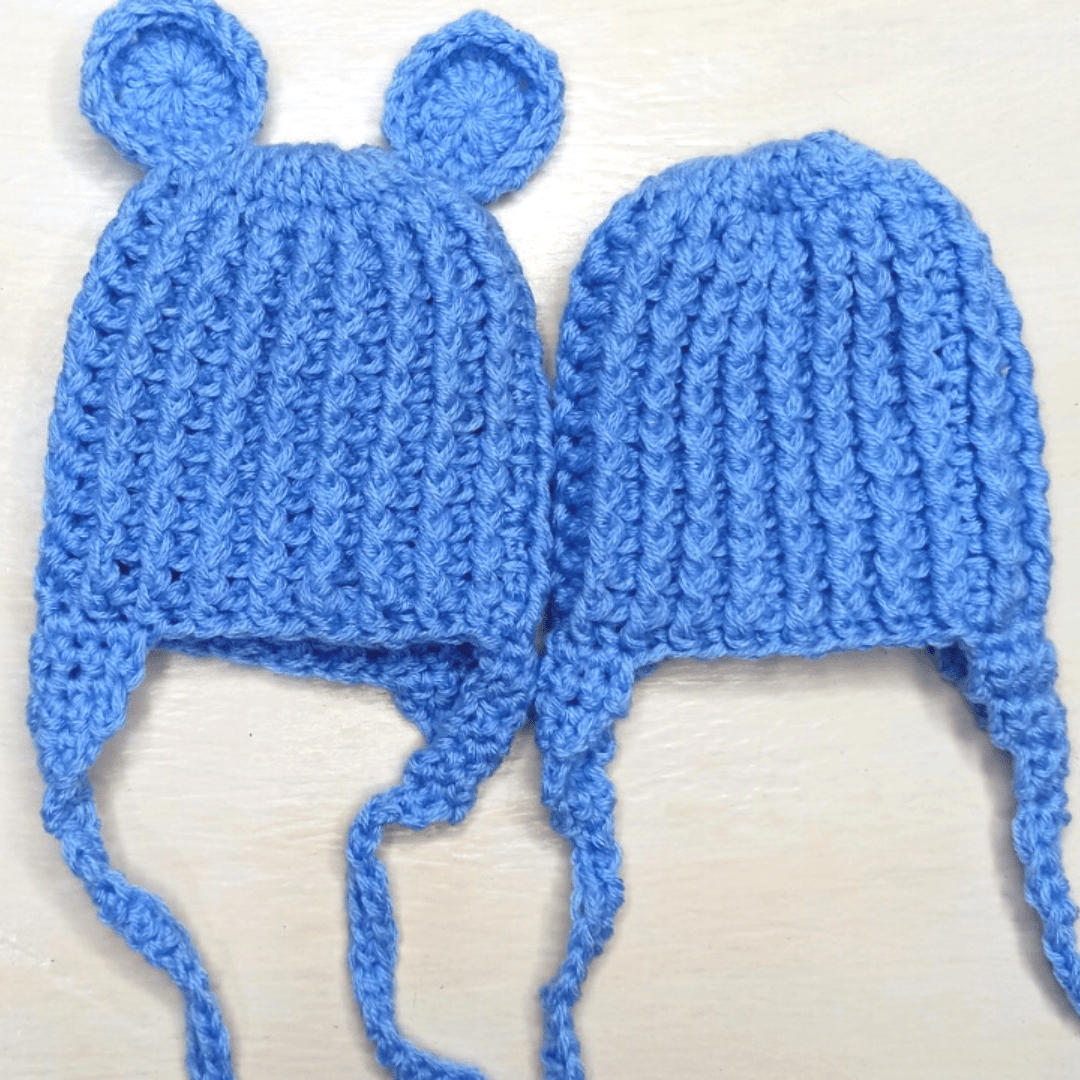
If you are looking to make a cute crochet baby hat with some bear ears, then this one might just be the one. I was fascinated with how fast this baby hat was done. Literally 30 minutes!
Remember you can always get the Ad-Free PDF Version on Ribblr ($1.50).
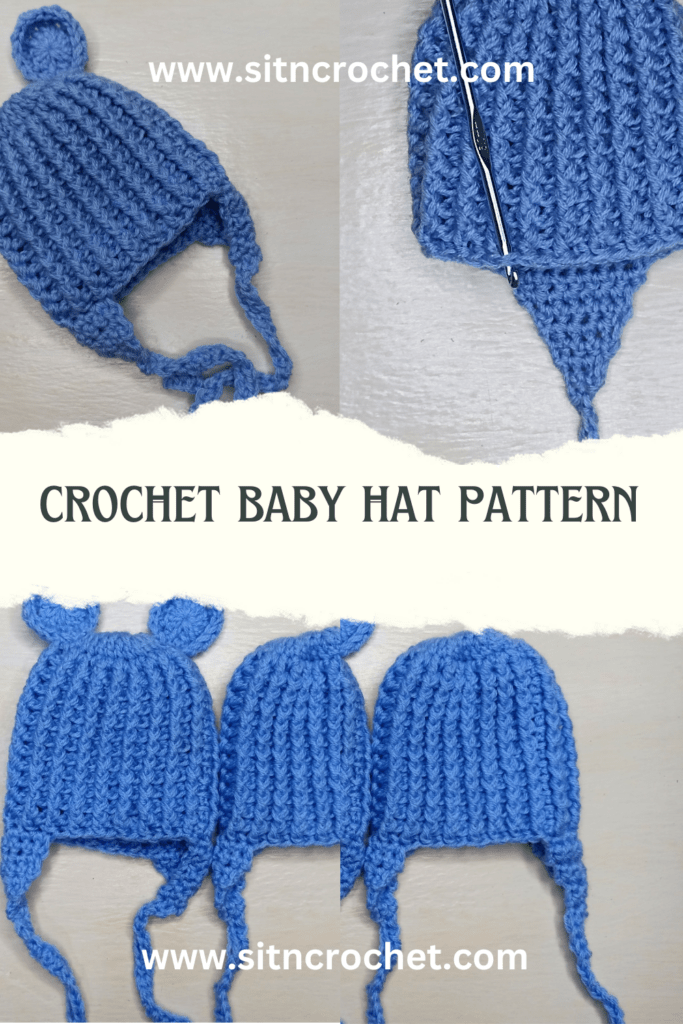
How To Crochet A Baby Hat
Crochet baby hats can be very good therapy. You just put on some lovely music or a book, and you crochet away! Before you know it, you have made 5 crochet baby hats in a day.
Like i said, this is a beginner friendly crochet project. If you are looking for other beginner crochet projects, then this crochet infinity scarf will be grately loved.
Construction
We begin by making a magic ring and placing single crochets depending on the size you are making, the number of stitches will differ.
We will then increase for a few rows, again, this will differ for all sizes, before we begin working the fp and bp stitches.
At the end, we will work the earflaps and all the strings by making chains and working single crochets.
Make the bear ears(optional), sew them on and there you have it! If youa re more of a visual learner, then i believe a YouTube tutorial will be your best friend.

SIZES: 0-12 months.
MEASUREMENT: Finished 0-3 hat measured 5” long and5” wide unstretched
GAUGE: 16 stitches in 12 rows = 4”X4”
NOTES:
- The size guide will read as follows: 0-3(3-6,6-9,9-12)
- Ch 2 does not count as a stitch
- Ch 1 does not count as a stitch
MATERIALS
- DK weight yarn
- 5.00mm crochet hook
- Yarn needle
- Scissors
Crochet Baby Hat Pattern
Make magic ring and ch 1,
INCREASING
ROUND 1: sc 13(18,23,26) into the circle. Close it tight and ch 2.
ROUND 2: ch 2, 2dc in each stitch around, slst to join
ROUND 3: ch2, 1dc, 2dc (rep all the way round) For 0-3 months, stop here and start with the Front post and Back post dc.
ROUND 4: ch 2, 1dc, 1dc, 2dc (rep all the way round) For 3-6 months, stop here and start with the Front post and Back post dc
ROUND 5: ch 2, 1dc, 1dc , 1 dc, 2 dc (rep this all the way round). For 6-9 months stop here and start with the front post and back post dc
ROUND 6: ch 2, place 1 dc in 4 stitches, then increase in each 5th. Rep this all the way around.
FRONT & BACK POSTS
Ch 2, change between back post and front post dc all the way round.
When you reach the ch 2, slst to the top ch 2 and rep. Do not treat the ch 2 as a stitch.
Rep this till rows 12(16,20,24,28) be sure to put it on the baby, if it does not cover enough, you can always add more rows.
EAR FLAPS
Ch 1, sc in the same st as the ch, sc in the next 8(10,12,14,16) st, ch 1 and turn, dec 1 stitch for each row till you remain with 1, ch 26(29,32,35) sc in the back bumps back up, slst to the beginning of the ch, ch 1 and cut the yarn, weave it in.
Lay the hat flat, eyeball where the ear flap began to work the other ear flap,
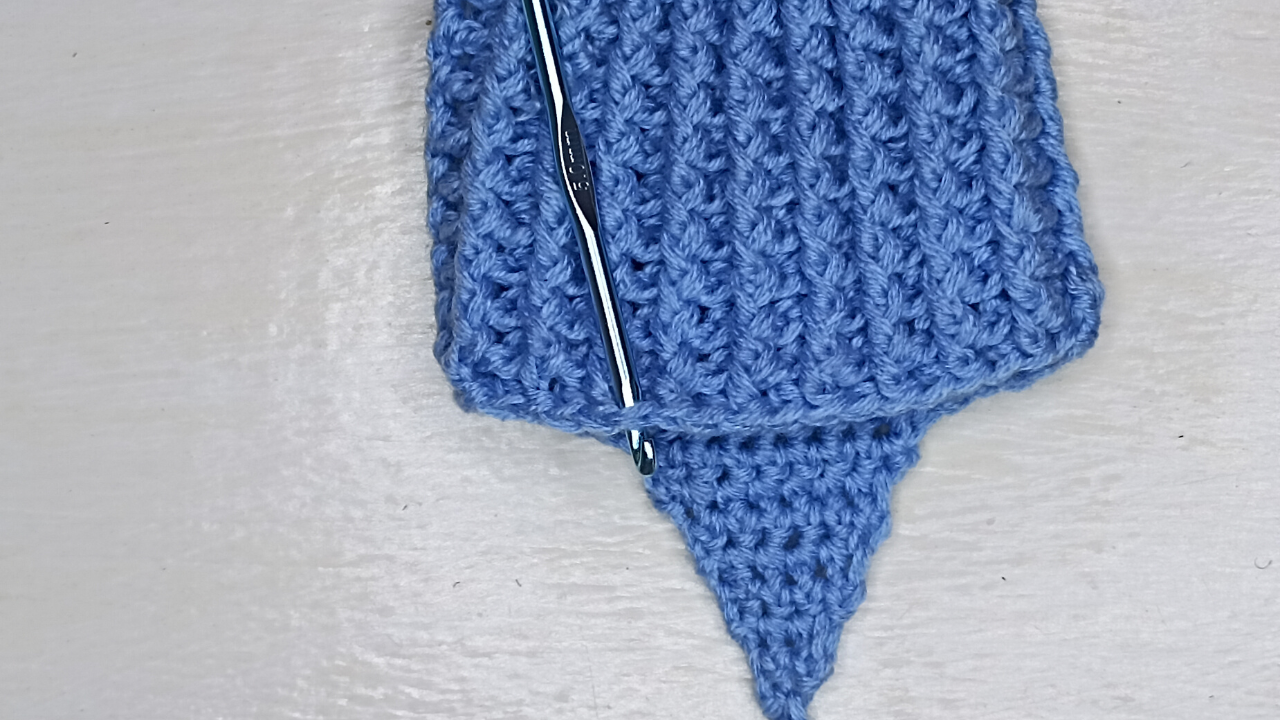
and rep for the other ear flap.
BEAR EARS
Remember this is optional, but i thought they were really cute.
Make a magic loop, ch 2, place 12 dc. Slst to join, ch 1, place 1 hdc, 2hdc(rep this all the way round,) slst to join, ch 1 and cut. Leave a tail to weave into the hat. Make 2
Connect the ears where you think they best look cute. For size 0-3, I placed them between the second and third row. Place them the row before the fp and bp stitches begin if you are not sure where to connect the ears. And you are done!