
Hi there, ready to make your first crochet tote bag for the year? Well this will be the easiest crochet handbag pattern yet.
I know i said the same for the crochet ribbed beanie and the crochet shawl, but trust me, this is sooooo easy and repetitive and simple. As simple as they come literally
This post may contain affiliate links, view the disclaimer policy
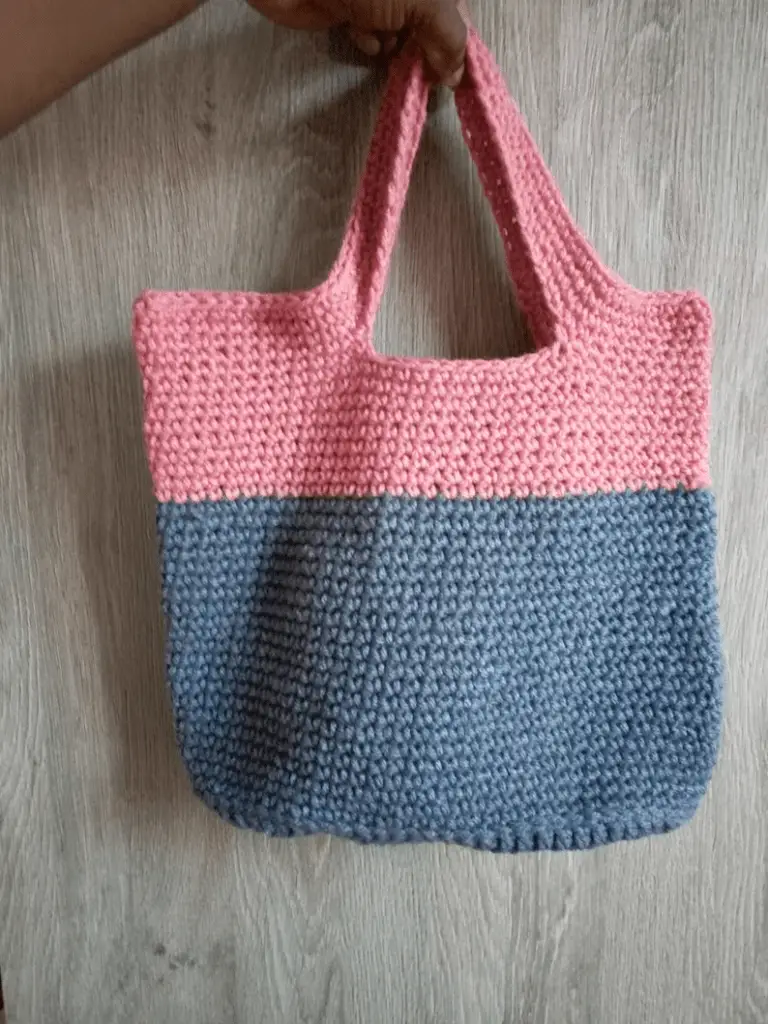
Crochet Tote Bag Free Pattern
Before we go any further, this crochet tote bag has a printable PDF ($2) on Etsy and $0.90 on Ribblr incase you wish to purchase that and browse our other crochet PDF printable patterns,
When you create the crochet bag, be sure to share the beauty in our facebook group and tag us on Instagram and Pinterest.
When i finish making a crochet item, i usually take it apart to reuse the yarn for future projects, it breaks my heart, but we got to do what we got to do to make the living right?
Until the business grows, i will keep my crochet projects and do give aways.
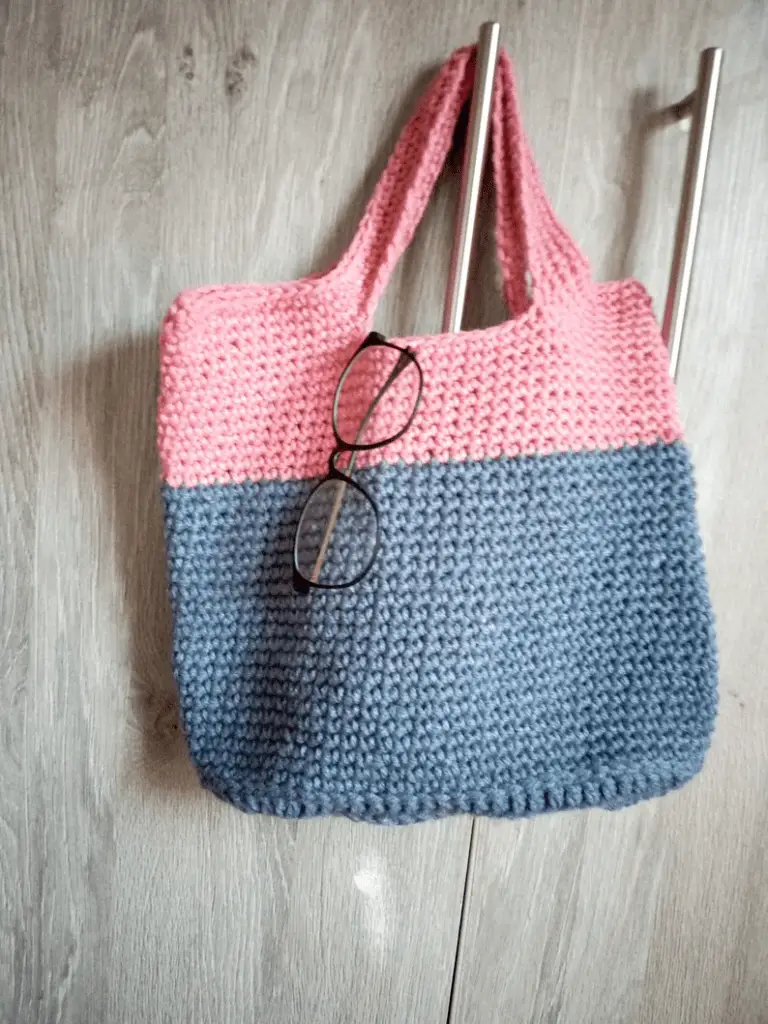
So as i was saying, i take projects apart to re- use the yarn, well not in this case, the crochet tote bag for beginners is currently used as my yarn storage.
I have lot of yarn balls in there as the yarn i used is very stretchy. We will definitely look into better yarn storage in the future
The crochet tote bag can be a great carrier of yarn when going to the park and you cannot leave your crochet at home, but during this time of year, not many people are going to the park as it is cold in some countries.
A crocheted bag is an excellent spring or summer project when you don’t feel like stitching up a warm blanket or a chunky scarf.
If you don’t need a bag of your own (although who can’t use another bag?), a handmade bag can make the perfect gift. Or, stitch up a few for your local craft fair!
Crocheted bags have so many uses, from holding your goods at the farmers market, toting around beach supplies, carrying your groceries on your weekly supermarket trip, and more!
Where are you reading this blog post from? Comment below!
Tips for Crocheting Bags
Here are a few tips for creating the perfected crocheted bag.
The right yarn
While there’s certainly room for creativity, using a durable yarn that fits your project type well will make for a stronger, longer-lasting bag. I’ve listed the ideal yarn weight and a suggested yarn type for each pattern to make picking out the perfect yarn easy. All you have to do is choose your favourite colour!
Check your gauge to get the right size.
Unlike a sweater or a pair of socks, a bag is usually a little more forgiving when it comes to size. Still, if you want your bag to work up to the pattern’s suggested size, it’s important to make a gauge swatch to ensure you have the correct size hook before getting started.
Consider adding a lining.
Many of the modern crochet bag patterns we come across include instructions for adding a liner to your bag.
While not always necessary, a liner will add a professional look while ensuring that your belongings are safe and sound in your bag. Adding a liner is relatively simple and will increase the quality and durability of your bag for years to come!
However, since most of these bags are made with durable yarn and feature tight, dense fabrics, a liner usually isn’t an absolute necessity.
Recommended Supplies for Crochet Bags
Most of these easy crochet bag patterns only require a few simple supplies. Of course, you’ll need yarn and the correct size crochet hook for each one.
- Strong yarn
- Crochet hooks
- Other notions, like buttons or zippers.
Many patterns suggest having stitch markers, and some require a fabric liner, button, or zipper.
You’ll notice that natural fibre yarns, like cotton, are popular for crochet bags since they’re often stronger and more durable than acrylic yarns.
And while the suggested yarns vary for each crochet bag pattern, medium-weight cotton yarn is a popular choice for many. If you’re not sure which yarn to choose, you can’t go wrong with Lion Brand pound of love. However, many of these patterns below are great projects for using up whatever extra yarn you may have on hand.
How to crochet a tote bag
Easy, this is oing to be a one day crochet project. To crochet a tote bag, follow the following steps:
- Step 1: Start by crocheting the base of the bag. You will do this in whatever manner the crochet pattern asks for.
- Step 2: Them, you will work the body of the tote bah.
- Step 3: Work the straps or bag handles if you will crochet thesm on the bag
- Sttep 4: Cut off any excess yarn and weave in the ends.
Can i crochet a tote bag as a beginenr?
Absolutely!
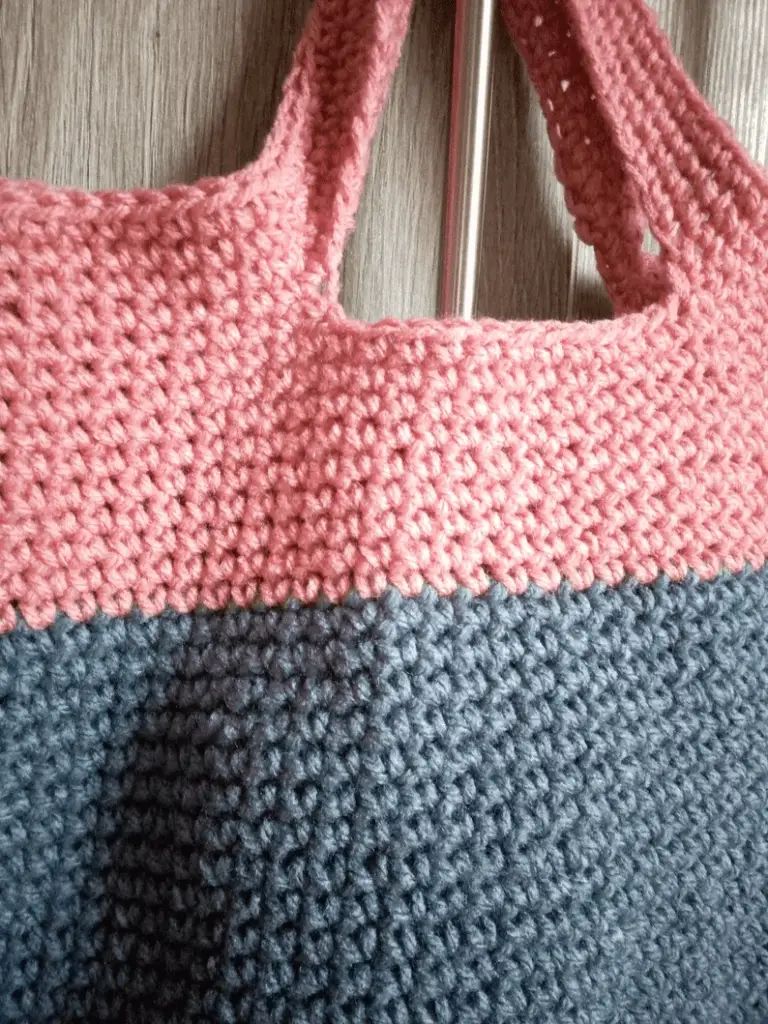
This bag is worked using the single crochet. It is a beginner friendly crochet stitch.
Stitches used in crochet tote bags
There are a variety of crochet stitches that you can use to crochet your bag. You can not use any stitch, as you want the bag to have some hold. Howeer, this will depend if you decide to give it a linning. In this case, a lacy stitch would be fine. Oterwise, basic stitches used for tote bags are:
- Single crochet– Just like this tote bag uses. the single crochet is a tight stitch, ebven without a linning, you will not lose items from your bag
- Half double crochet- This stitch is also another secure stitch, with this, you can trust your belongings to be safe, however it does have moer stretch than the single crochet stitch.
- Herrignbone stitch– This is another beautiful crochet stitch used to work a tote bag. It is not beginner friendly, but can be with enough practice.
The crochet tote bag was designed to be in one color, but i happened to run out, s be sure to purchase the 2 balls of 100g yarn, do not make my mistake. But the mistake happened to be a cute one right? I love it!
The crochet tote bag free pattern for beginners
Let’s get intp the pattern shall we?
good to know
• This pattern can be easily adjusted to a bigger size or smaller size of your liking, just follow the instructions.
• The bag is worked in the round.
• The finished work measured 12” side to side, 10.5” along.
terminology
US
skill level
Absolute Beginner
guage
• 13 rows in 4”,12 st in 4”
materials
• 2 balls of 100g worsted weight yarn
• 5 stitch markers
• Measuring tape
Crochet tote bag free pattern
R1: Ch 22, palce 5 dc in third ch from hook, dc till the end leaving One ch at the end. In last ch, place 6 dc. Proceed to work on the other side of the work( see picture below), at the end. sl st to join.

NOTE: Place stitch markers in the first and 6th st we increases on both ends of our work to avoid confusion.
R2: Ch2 in same st place a dc, place 2 cd in the next 5 dc. We will be increasing in the 6 st at the end. Place 1 dc in every ch till you have the last set of increase at the end. Place 2 dc in each of the 6 st, then place 1 dc in the remaining st. sl st to join at the end. At the end of row 2, you should have 12 st at the ends of your work.
R3: ch2, in same st place a dc. In the next place 1 dc, the next 2dc. Repeat for the increase areas.

R4: ch 1 Go around your work placing sl st.

R5: Ch1, sc all around. Sl st to join.
R5-R22 Change colors (OPTIONAL), place sc.
R23-30- lay your work down and locate where you want the handles to be. Place them 12 st apart. Sc around as normal. When you reach the st marker, ch 30 and connect with the other st marker. Repeat for the other st marker

R31-34 Work rows of sc 4 rounds, slst and cut.
And yout work is all DONE!!!!
I hope you loved this crochet tote bag pattern and you are planning on making a few. This specific crochet tote bag does not take so much time, it all depends on the base. So you can make as many as you want in a short period!