Knitting is a wonderful hobby that can result in beautiful and practical creations. One of the many things is a knit shoulder bag, which can be a stylish and functional accessory. In this article, we will discuss how to knit a shoulder bag and provide some tips and tricks to help you along the way.
Knitted shoulder bag supplies
Materials needed:
- Yarn in desired color(s)
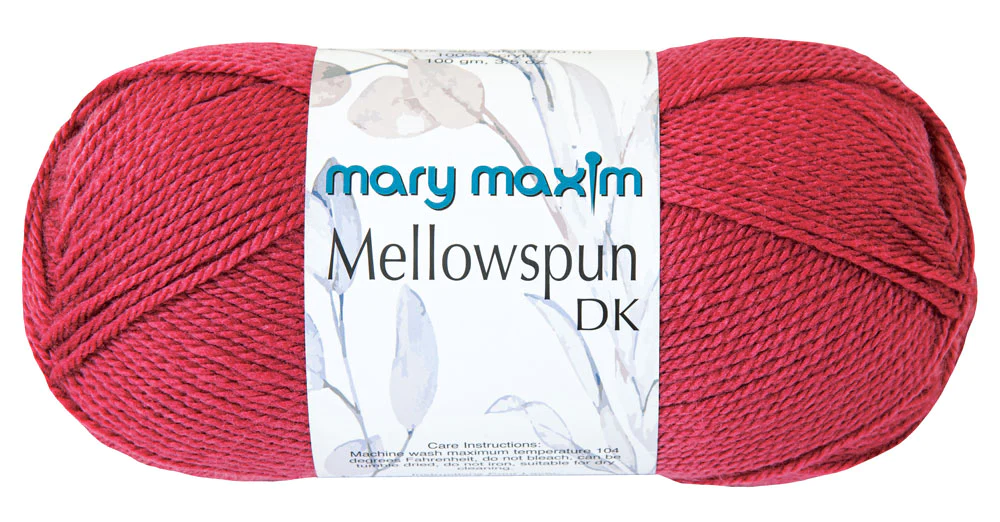
$3.99 SALE!!!
Grab all yarn weights for your crochet project!
- Knitting needles (size depends on yarn weight)

Knitting Needles
- Tapestry needle
- Scissors

Yay or Nay
- Leather or fabric for straps (optional)
How to : knit shoulder bag step-by-step
Step 1: Choose your yarn and needles
The first step is to choose your yarn and needles. The size of your needles will depend on the weight of your yarn. Thicker yarn will require larger needles, and thinner yarn will require smaller needles. Choose a yarn that is durable and suitable for the purpose of a bag. Cotton or wool yarns are good options.
Step 2: Cast on stitches
Cast on the desired number of stitches, depending on how wide you want your bag to be. A good starting point is 40-50 stitches. Make sure to leave a long tail when you cast on, as you will use it later to sew up the bottom of the bag.
Step 3: Knit in the round
Once you have cast on your stitches, join them in the round, being careful not to twist them. Knit in the round until your bag is the desired length, which will depend on how deep you want your bag to be.
Step 4: Bind off stitches
When your bag is the desired length, bind off your stitches. Cut your yarn, leaving a long tail to sew up the bottom of the bag.
Step 5: Sew up the bottom of the bag
Using your tapestry needle and the long tail of yarn you left, sew up the bottom of the bag. Weave in any remaining ends.
Step 6: Add straps
If you want to add straps to your bag, cut two pieces of leather or fabric to the desired length. Sew them onto the sides of your bag using your tapestry needle and yarn. You can also knit straps if you prefer.
Step 7: Finishing touches
Add any finishing touches you desire, such as a button or a lining. Your bag is now complete and ready to use!

Can i knit a shoulder bag as a beginner?
Yes, you can definitely knit a shoulder bag as a beginner! Knitting a bag is a great project for beginners because it allows you to practice several basic knitting skills, such as casting on, knitting in the round, and binding off, while also creating something functional and useful.
When starting out, it’s important to choose a pattern that is appropriate for your skill level. Look for a pattern that is labelled as “beginner” or “easy” and that uses basic stitches and techniques. You can also look for tutorials or video instructions online to help you learn the stitches and techniques you need.
Start with a smaller project, such as a pouch or a small tote bag, a knit bandeau can be easy too as it is basic, before moving on to a larger shoulder bag. This will help you get a feel for the process and gain confidence in your knitting abilities.
Remember that knitting is a slow and steady process, and it’s okay to make mistakes along the way. If you make a mistake, simply undo the stitches and try again. With practice, you will become more comfortable and confident in your knitting skills and be able to tackle more complex projects.
Overall, knitting a shoulder bag is a fun and rewarding project that can be completed by knitters of all levels. Don’t be afraid to try something new and challenge yourself – you may be surprised at what you can accomplish.
KNIT SHOULDER BAG PATTERNS
1. Knit Beach Shoulder Bag
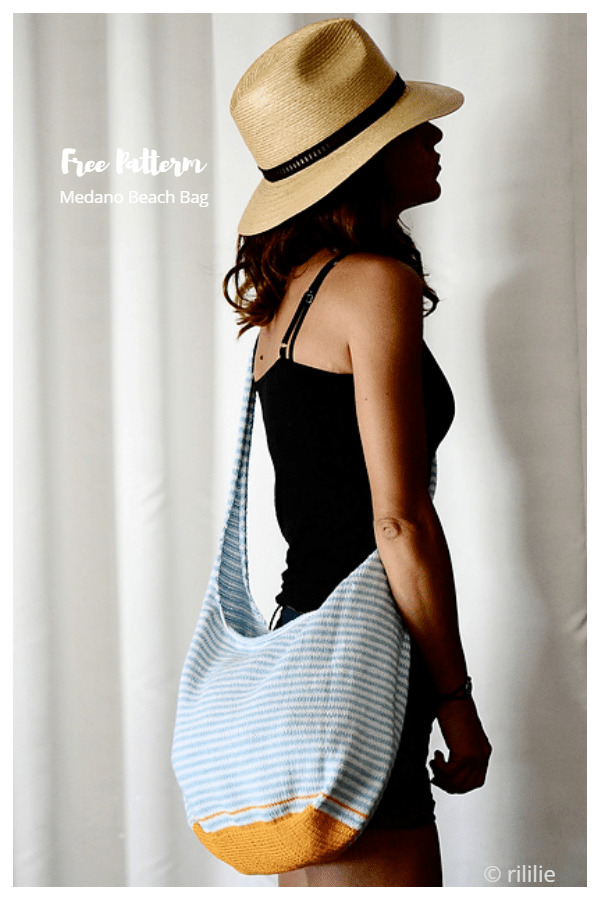
Grab the free knitting pattern HERE
2. Knit mesh bag free pattern
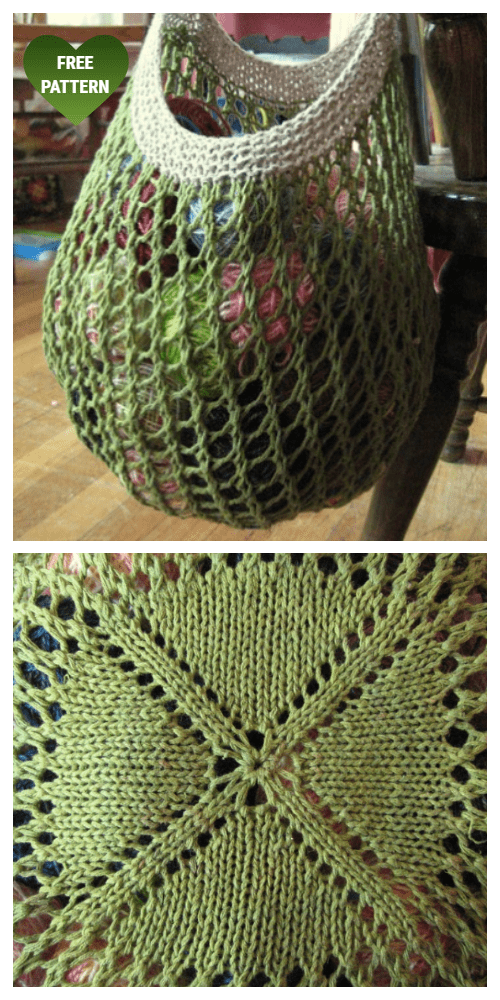
Achieve this mesh knit shoulder bag with this free pattern
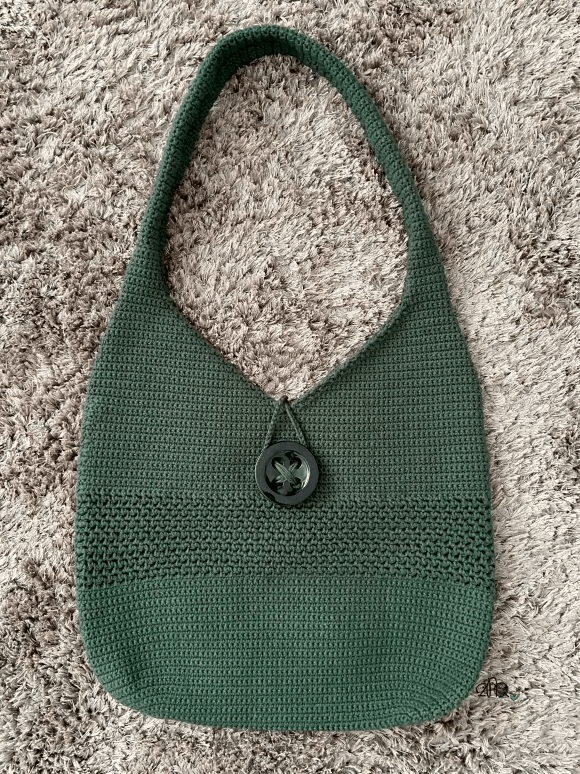
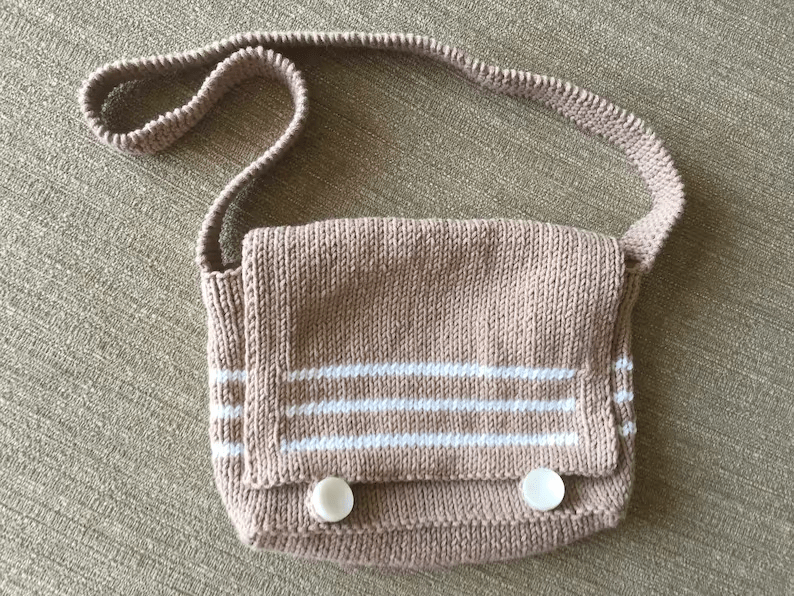
3. Knit shoulder bag pattern
Find the pattern to this knitted bag HERE
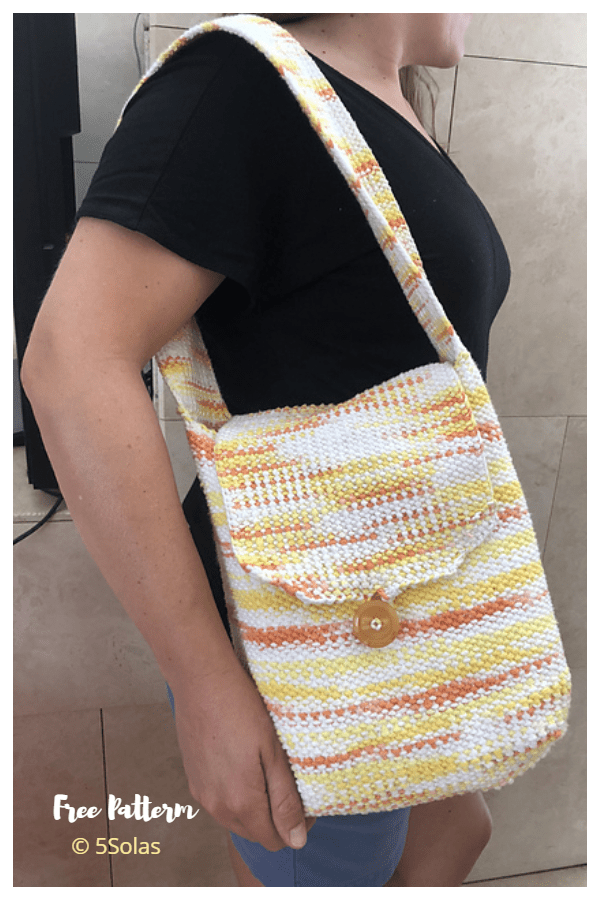
4. Messanger knit shoulder bag pattern
Grab the pattern HERE
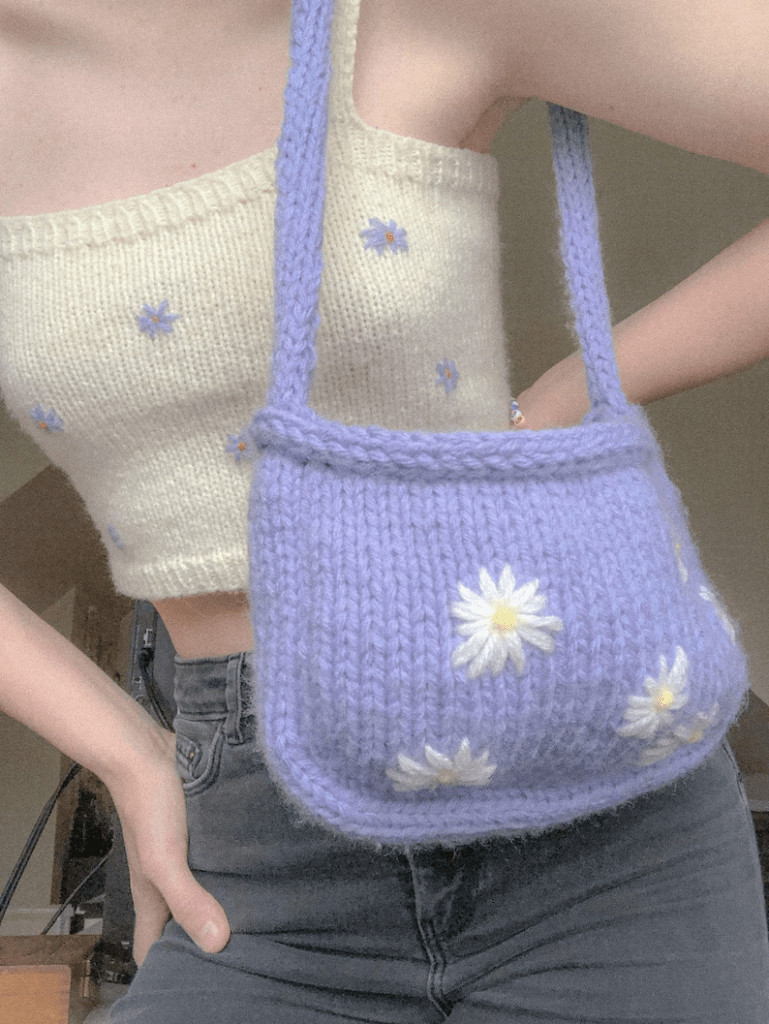
5. Daisy Knit shoulder Bag
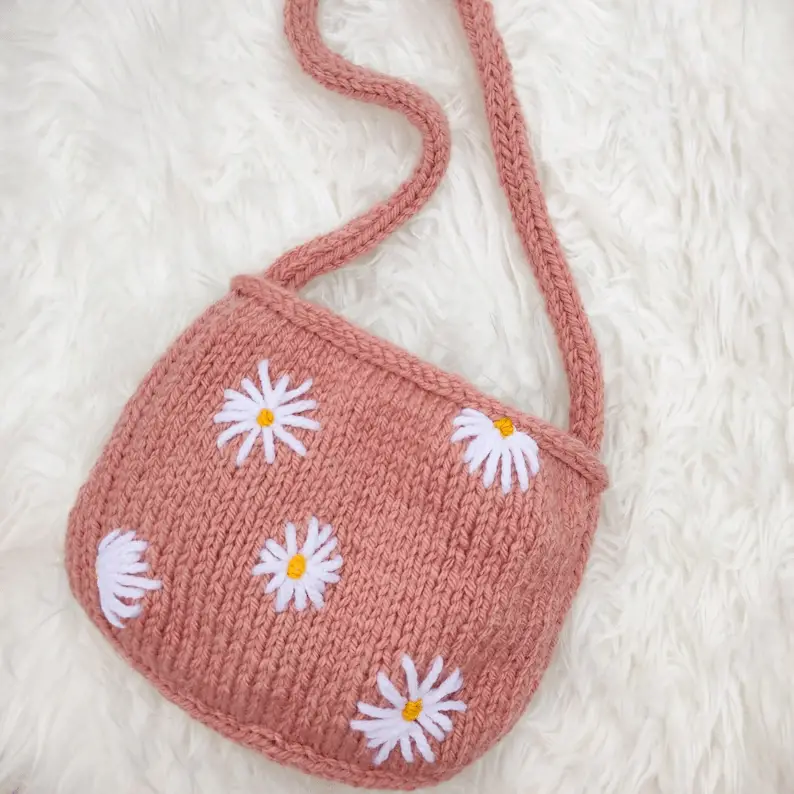
Grab the pattern HERE.
How to Add lining to the knit shoulder bag
Adding a lining to a knit shoulder bag is a great way to make it more durable and functional. The lining can help protect the bag’s interior from wear and tear, and provide additional structure and support. Here’s how to add a lining to your knit shoulder bag:
Step 1: Measure the bag Start by measuring the inside of the bag. You will need to know the width, depth, and height of the bag. Write these measurements down as they will be needed when cutting the lining fabric.
Step 2: Cut the lining fabric Using the measurements from step 1, cut the lining fabric. You will need to cut two pieces: one for the front and back of the bag, and one for the bottom of the bag. The pieces should be the same size as the measurements taken in step 1. Be sure to leave a seam allowance of about 1/2 inch on all sides.
Step 3: Sew the lining pieces together With the right sides facing each other, sew the front and back lining pieces together along the sides and top using a sewing machine or needle and thread. Leave the bottom of the lining open for now.
Step 4: Sew the bottom of the lining Fold the bottom of the lining fabric in half so that the two sides meet in the middle. Sew the sides of the bottom piece together, leaving about 1/2 inch seam allowance on each side. Then, sew the bottom of the lining to the sides and front/back pieces, making sure to leave the top of the lining open.
Step 5: Iron the lining Using an iron, press the seams of the lining open. This will make it easier to insert the lining into the knit shoulder bag.
Step 6: Pin the lining to the knit bag Place the lining inside the knit bag, making sure the right sides of both the lining and the bag are facing each other. Pin the top of the lining to the top of the bag, being careful not to pin through both layers of fabric. Leave a small opening for turning the bag right side out.
Step 7: Sew the lining to the bag Using a sewing machine or needle and thread, sew the top of the lining to the top of the bag, making sure to leave the small opening for turning the bag right side out.
Step 8: Turn the bag right side out Carefully turn the bag right side out through the small opening in the lining.
Step 9: Finish the lining Using a needle and thread, hand stitch the small opening in the lining closed.
Congratulations! You have now successfully added a lining to your knit shoulder bag. This lining will help keep your belongings from falling out and will also add a professional finish to your handmade bag.
Addig a zip to the knit shoulder bag
Tips and tricks
- When knitting in the round, it can be helpful to use stitch markers to keep track of the beginning and end of each round.
- If you want a more structured bag, you can line it with fabric and sew in interfacing.
- To add a decorative touch, you can knit a different color yarn into your bag in a stripe pattern.
- Don’t be afraid to experiment with different patterns or textures to create a unique bag.
knitting a shoulder bag can be a fun and rewarding project. With the right materials and some patience, you can create a stylish and functional accessory that you can use for years to come. So, pick up your needles and yarn, and get knitting!
Stitches & Techniques to make the perfect Knit shoulder bag
Before we finish, we need to cover some of the essential stitches and techniques that you can use to knit a stylish and durable knit shoulder bag.
If any of the stitches are new to you, be sure to find a tutorial that will help you catch up before you attempt the knit shoulder bag pattern.
The stitches and techniques you need to master include:
- Casting On: The first step in knitting your shoulder bag is to cast on. There are several ways to cast on, but the long-tail cast on is a good choice for bags. This technique creates a stretchy and sturdy edge. You can cast on as many stitches as you like, depending on the size of your bag.
- Knitting in the Round: Once you have cast on, you will need to join your work in the round. This means that you will be knitting in a continuous spiral, rather than working back and forth in rows. To do this, place a stitch marker on the needle to mark the beginning of the round, and then knit all stitches in the round.
- Stockinette Stitch: The stockinette stitch is a simple and versatile stitch pattern that creates a smooth, flat fabric. To knit stockinette stitch, knit every stitch on the right side and purl every stitch on the wrong side. This creates a knit side and a purl side, which you can use to create a decorative pattern or texture on your bag.
- Garter Stitch: The garter stitch is another simple stitch pattern that creates a bumpy, textured fabric. To knit garter stitch, knit every stitch on every row. This creates a fabric that is reversible and sturdy, making it a good choice for bag straps or edges.
- Ribbing: Ribbing is a stretchy stitch pattern that is often used for cuffs, collars, and edges and often can look good with the knit shoulder bags. To knit ribbing, alternate knitting and purling stitches in the same row. This creates a fabric that has a lot of give and will stretch to fit around curves or edges.
- Binding Off: Once you have knit the body of your bag, you will need to bind off to finish it. To bind off, knit the first two stitches, then lift the first stitch over the second stitch and off the needle. Knit the next stitch and repeat this process until you have only one stitch left. Cut the yarn and pull it through the remaining stitch, then weave in the end.
- Sewing and Finishing: To complete your knit shoulder bag, you will need to sew up any seams and add any finishing touches, such as handles or closures. Use a tapestry needle and the same yarn to sew up any seams, being careful to create a neat and sturdy finish.
Knitting a shoulder bag is a fun and rewarding project that allows you to create a personalized and practical accessory.
By using the techniques and stitches outlined in this article, you can create a stylish and durable bag that will serve you well for years to come.
Whether you are an experienced knitter or a beginner, with a bit of practice and patience, you can knit a beautiful and functional shoulder bag that you will be proud.
Can i sell knit shoulder bags?
Yes, you can sell knit shoulder bags!
The price at which you can sell your bags will depend on a number of factors such as the quality of materials used, the complexity of the design, the time it takes to make each bag, and the market demand.
Generally, handmade items tend to be more expensive than mass-produced items because of the time and effort that goes into making each one.
Knit shoulder bags can range in price from $20 for a simple design to $100 or more for a more intricate design or higher quality materials.
It’s important to research the market demand and price your bags competitively, taking into account the cost of materials and the time it takes to make each bag.
You may want to consider selling your bags online through platforms such as Etsy, where you can reach a global audience and set your own prices.
Alternatively, you could sell your bags at local craft markets or in small boutiques. Whatever method you choose, be sure to take pride in your work and market your bags to potential customers in a way that showcases their unique beauty and quality.
CONCLUSION
In conclusion, knitting a shoulder bag is a wonderful and creative project that allows you to express your personal style and create something both beautiful and functional.
With the addition of a lining, you can add an extra layer of durability and protection to your bag, making it more practical for everyday use.
By following the steps outlined in this article, you can easily add a lining to your knit shoulder bag and enjoy using it for years to come.
So grab your knitting needles, choose your favourite yarn, and start knitting your own shoulder bag today!