
If you have been looking for a crochet bucket hat pattern, then this post is gonna be your favourite tody. In this post, we will show you hate to make a crochet sun hat with step by step picture instructions.
This crochet hat is the perfect beginner project. If you are learning how to crochet, then be sure to enroll in the crochet courses we have just started to offer. ENROLL TODAY.
You can purchase the inexpensive Ad-Free PD Pattern On Etsy.

If you are looking for an easy pattern or something quick fun and effective to make, then this crochet sun hat pattern might just be the one.
If you are a fan of quick crochet projects, then we might just be best friends. I want my crochet project to be off my hook as soon as it get’s there, this is funny considering how much i love to crochet sweaters.
This bucket hat will be off your hooks in under 2 hours or even less.
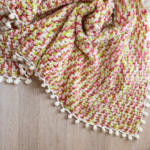
You can customize this crochet bucket hat by changing colours in each row, it does ot have to be a solic sun hat like mine. You can make it a scrap yarn bucket hat project. Like the mui mui crochet pattern.

As i said earlier, this is a great crochet beginner project. Each row is covered with a picyre, and we use a worsted weight yarn so the stitches will be too big to skip. With that, let’s talk about the supplies needed for this crochet bucket hat pattern.
Recommended Supplies
To achieve this exact crochet bucket hat, be sure to have access to the materials listed below. They are affiliate links which means i will make a small commission should you choose to purchase. Please do, it is a great way to support my small business so i can keep producing more free crochet patterns.
You will need:
- Worsted weight yarn– Use the Schitt’s Greek Yarn by Lion brand, for the perfect looking crochet bucket hat
- 5.00m crochet hook– i used the 5.00 crochet hook my personal favourite crochet hook.
- Stitch marker
- Scissors
How To Crochet A Bucket Hat
A crochet bucket hat can be made in so many dofferent styles like squares, animal shapes. But this easy beginner friendlt crochet bucket hat pattern follows these simple steps:
- Make a magic ring, place 10 dc
- Slst to join, ch1 and place two ddc in each previous row giving you 20 dc.
- Continue increasing till your required size
- Working in the back loops only, work normal dc. Ths gives the bucket ht it’s bucket shape
- Baack to increasing for the flaps. You will increase in the front loops, in every 6th row, the numbers will increase as the rows increase.
- After you are satisfied with the number of rows, cut the yarn, weave in the ends. You are done.
- Free Jumper Knitting Pattern- Basic Sweater

- Free Crochet Granny Stripe Blanket Pattern
- Must Have Crochet Zip Sweater Pattern

- 10 Chunky Crochet Baby Blanket Free Pattern

- Must Have A Line Dress Sewing Patterns

Best yarn for crochet bucket hat
If i was to recommend a yarn for bucket hats, i would recommend something that is friedly with your skin. Cotton yarn usually wins here.
Amoubt of yarn needed
1 ball of worsted weight yarn for size small
- 1.5 balls of worsted weight yarn yarn size medium
- 2 balls of worsted weight yarn for size large
Bucket Hat Mesuremeents
Finished work Measurement :
S(7”), M( 9”), L(11”)
Gauge: 6 stitches in 3 rows 4”X4”
Bucket Hat Pattern Notes
The pattern can be adjusted to any size of
your choice and we explain how in the
pattern.
Terminology
US
Abbreviation
DC- Double crochet
-Slst- Slip Stitch
-Ch- Chain
-Bl-Backloop
-FL-Front loop
-Incr- Increase
-St- Stitches
-Rep- Repeat
Easy Crochet Bucket Hat For Absolute Beginners
Begin by making a magic ring

R1: for all sizes, Place 10 dc in the loop. At the end count to make sure there is 10 dc.
Slst to join.

R2 : ch 1, in the same st as joining, place 2 dc, place 2dc in the remaining 9. At the end you
should have 20 dc. Slst to join

R3 : ch1, in the same st as joining, place 1 dc, in the next place e2 dc. Rep this placing 2 dc
in evert second st. at the end of row 3 you should have 30 dc. Slst to join.

R4 : ch 1, in the same st as joining, place 1 dc, in the next st place a 1 dc, in the third st place
2 dc. Incr in every third st. rep till end of row. At the end you should have 40dc. Slst to join.

R5: ch1, in same st as joining place 1 dc and into the next 3 dc, incr in the 4th st and every
4th st till the end of the row. At the end of the row you should have 50dc. Slst to join.

R6:ch1, in the same st as joining place a 1 dc and into the next 4 dc, incr in the 5th st and every 5th st till end of the row. For size small, finish here, for size Medium rep same format
till row 8, for large repeat till row 10.

To Drop The Bucket Hat
Ch 1, working in the bl only, dc without any increases all the way around. Slst to join, ch1. Rep till you have a total of 5 rows for size small and medium, 7 rows for large.

To finish off the hat with the flappy round, we will go back to increasing.
However, the increase numbers will be different for all sizes.
R1 of increase, ch 1, dc in same st as joining just in the FL only, for size small start to increase in the 6th st and every 6th stitch, for size medium start to increase in the 7th, and large in the 9th all the st in this row are worked in the fl only.
R2 of the increase, ch1, dc in the same st as joining (normal dc not in the fl) incr in every 7(,8,10t)h st. slst to join
R3 of the increase, ch1, dc in the same st as joining (normal dc not in the fl) incr in every 8(,9,11t)h st. slst to join
R4 of the increase, ch1, dc in the same st as joining (normal dc not in the fl) incr in every 9(,19,12t)h st. slst to join
For large size only
R5 of the increase, ch1, dc in the same st
as joining (normal dc not in the fl) incr in
every 13th st
R6 of the increase, ch1, dc in the same st
as joining (normal dc not in the fl) incr in
every 14th st
At the end, slst to join,ch1 and cut.
Weave in the ends with the needle.
Your Bucket hatis all
done!!!