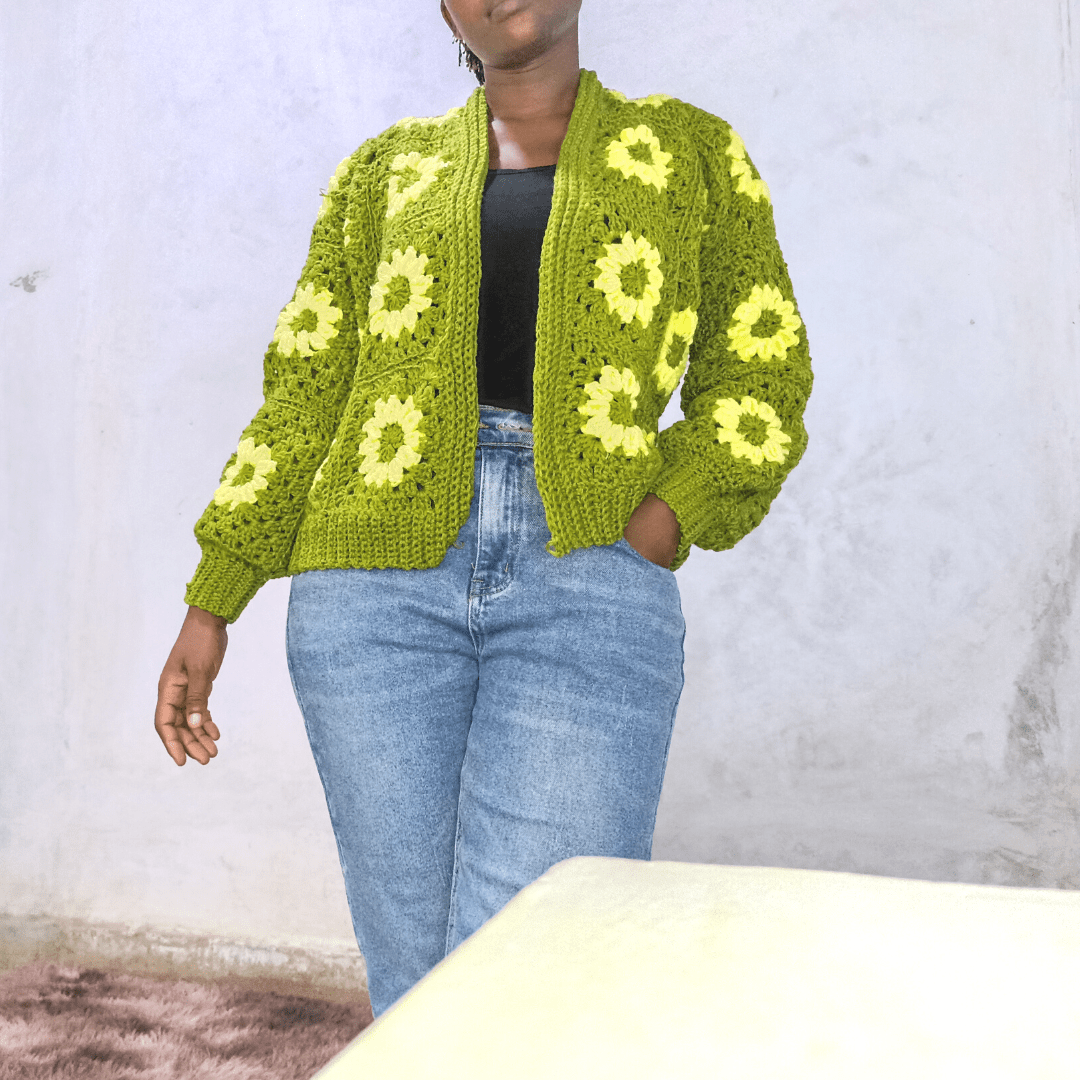
If you are a lover of the crochet daisy granny square cardigan then welcome! I just made a granny square crochet project! If you have seen some of my other crochet projects you might have heard me talk about how i do not have the patience for granny squares.
Get the Ad-Free PDF Pattern for $1.50 on Ribblr. Or head over to Etsy for the same pattern at $2.00.
Unless i was absolutely wrong then i just learnt patience, necause i found the daisy granny square cardigan very therapuetic. I loved connecting each and every square!
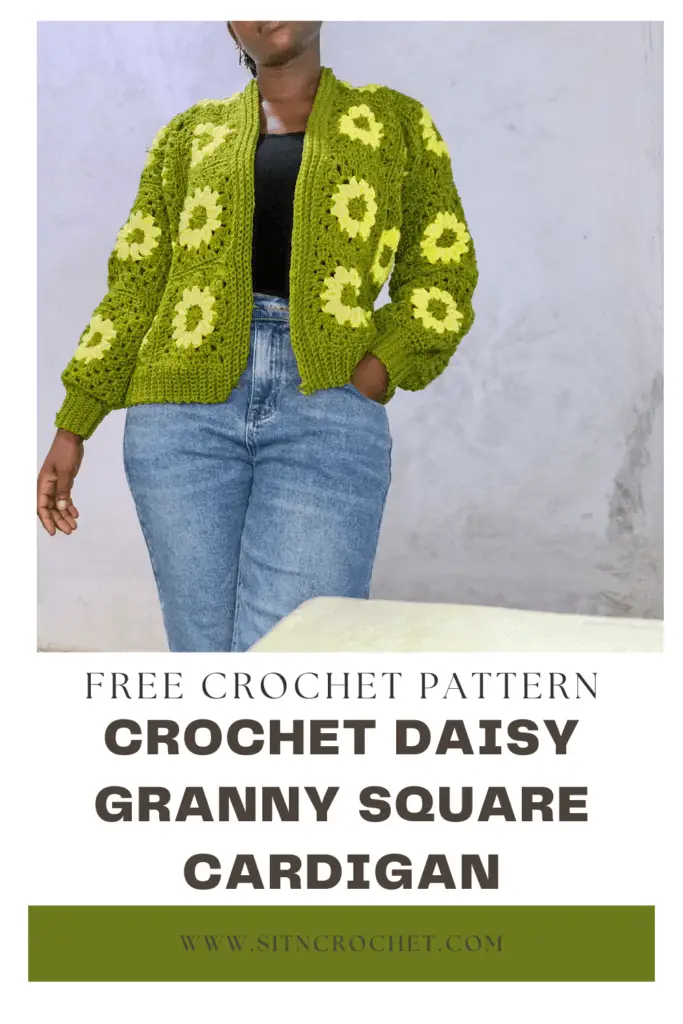
Crochet Granny Square Cardigan
I wrote a crochet granny square cardigan post, i did not think i would make my own any time soon. They are not only beautiful, but fun to make. I see myself working on a blanket very soon!
When i thought about this crochet project, i knew there was no turning back. I was so sure i will be sat down for a few days to a week to have this daisy granny square cardigan all done, but it’s almost a two days crochet project, i loved it!
How to crochet a daisy granny square cardigan
It will call for you to make many many granny squares, this of course will depend on the size of your cardigan. Then we lay them in the way the cardigan will form and start connecting them one by one. Add on the sleeves too and crochet the bands. Your daisy crochet granny square cardigan is all done!
Best Yarn For Crochet Cardigans
When it comes to crocheting a garmnet, worsted weight yarn is the best, however, in this case, i used a DK weight yarn to make this beautiful daisy granny square cardigan. Mary Maxim has a lovely collectionof DK weight yarn you an pick from.
You do not have to purchase this linked yarn, if you have some DK weight yarn stashed somewhere, you have found the project for it!
Supplise
To crochet a daisy granny square cardigan, you will ned to have the following supplies at your disposal:
- Yarn– You will need tow colour yarn for this cardign. To work the daisy and the granny square body
- 5.0mm crochet hook– To crochet the granny squares
- 4.0mm crochet hoook– To crochet the cardigan bands
- Scissors– I have never used the scissors for one crochet project before, except when i was crpchet the mosaic blanket
- yarn needle– to connect all the granny squares.
Crochet Daisy Granny Square Cardigan
Stitch library
- Ch- chain
- Dc- Double crochet
- Trb- Treble crochet
- Slst- Slip stitch
- Sc- Single crochet
Amount of yarn needed
This will depend on the size you are making. As the pattern contains one size, but we explain how to make it in multiple sizes, have 5 100g balls of DK weight yarn in green and 3 dk weight yarn in yellow ( if you decide to use my colors).
Materials
- Dk Weight yarn
- 5.0mm crochet hook
- 4.0mm crochet hook
- Yarn needle
- Scissors
- Measuring tape
Construction
We will begin by making the granny squares! These can be made bigger or smaller depending on the size you are working your cardigan. Following this, we will lay all the granny squares in the way they will form the cardigan, making sure the wrong side and right side are where they should be.
We will then start to sew them all together. I found this process very therapeutic. Just put on a nice show and enjoy yourself.
After we have connected the body, we will then connect the arms.
The arms had more rows on them, so I made sure to connect the body to see how much of a sleeve hole I needed to leave since the sleeve granny squares were bigger.
After connecting everything together, I then went on to sew the bottom band on the cardigan using the single crochet, then followed with the collar. Finally, decreased one row for the sleeves and slip stitched for the sleeve band.
Sizes
Finished garment:
Body: 22 inches long, 20 inches wide with band
Arms: 17 inches long, 7 inches wide with band
Gauge: 5 granny square clusters in 5 rows
Good To Know
- The whole cardigan is made of crochet daisy granny squares
- To make a bigger size, i suggest working more rows for the daisy granny squares or simple making more granny squares
- Chain 3 counts as a stitch
- Be sure to leave the granny squares on the right sides
- When you are done connecting your granny squares, be sure to fasten off tightly and securely.
CROCHET DAISY GRANNY SQUARE PATTERN
To make a granny square, with the green yarn,
make a magic ring.
Ch3,
Row 1: Place a total of 11 dc into the magic ring for a total of 12. Slst to the first dc, ch 1 and cut.

Row 2: Connect the yellow yarn to any stitch, ch 3, yarn over twice for a trb crochet, but pull through two loops leaving another loop on the hook, yarn over twice again, and rep this, do this for a total of 4 stitches then pull through all the loops to make a petal, ch 2. Rep this for all the 12 stitches.
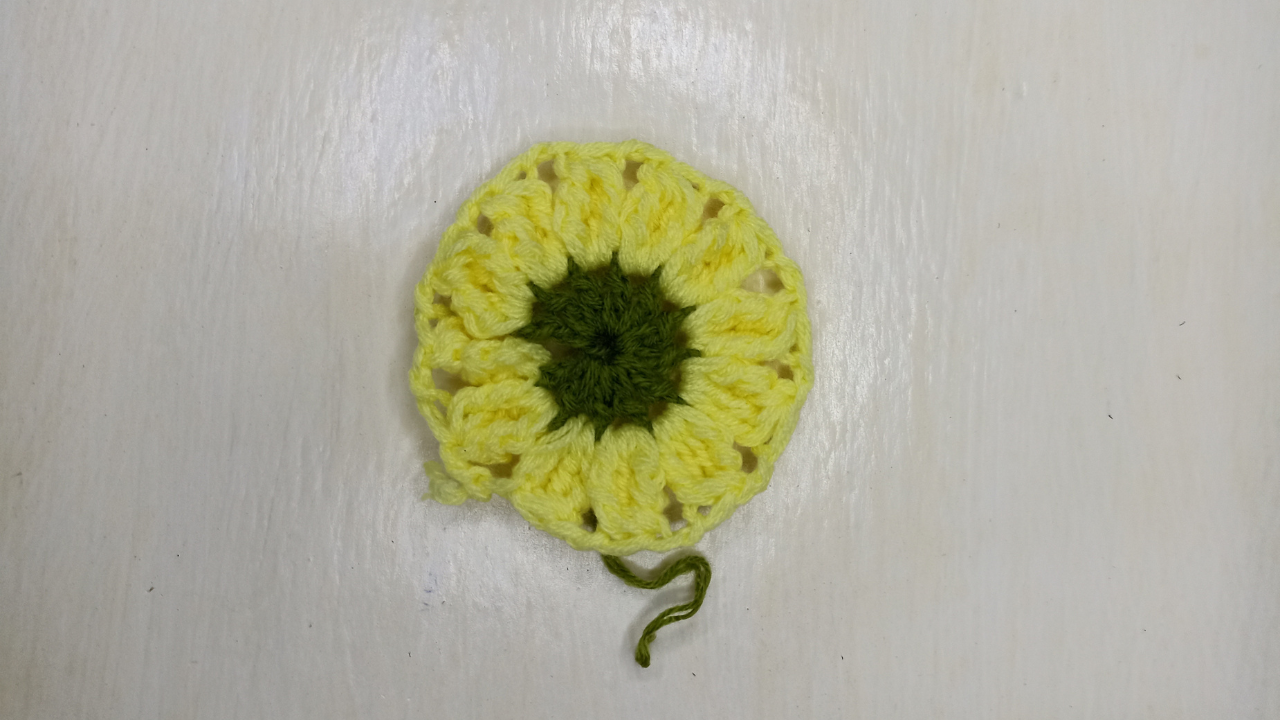
Slst to the first stitch you made, ch 1 and cut.
Row 3: Connect the green yarn to a ch 2 space and Ch 3, we will work into the ch2 spaces now. Place 2 dc into the same ch 2 space you chained 3, place another 3 dc into the next ch 2 space. Place another 3 dc into the next ch 2 space, ch 2, place another 3 dc in to the same ch 2 space. We have made our first corner.
Place another 3 dc in the next 2 ch 2 spaces, in the third make another corner, rep this for a total of 4 corners, slst to the first ch 3 you made to end the row.
Row 4: Ch 3, we will place these 3 cluster granny square stitches in between the previous row clusters, remember to make corners on the previous row corners too.
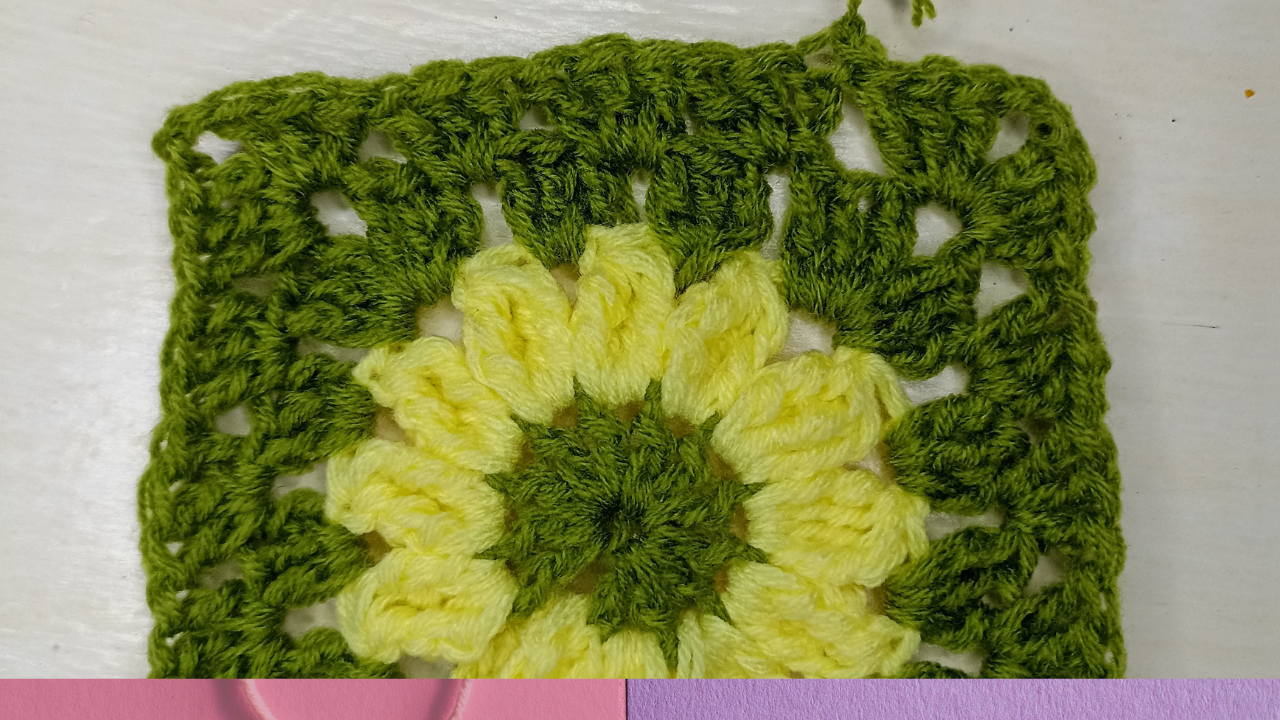
For larger sizes, please work extra rows for bigger granny squares. Or you can work more granny squares.
At the end of the row, slst to the first ch 3 of the row, ch 1 and cut. You have made your first granny square.
For the size i was making i made 2 rows of 4 granny squares making a total of 8 granny squares for one side panel and 16 granny squares for the back. You can choose to follow this or add an extra row for larger sizes.
I made a total of 32 granny squares for the body and 8 for the arms.
The arm granny squares had 4 rows instead of 2 to make them larger!.
Connecting
To connect the granny squares, lay them right sides facing down and sew the front panel granny squares, then the back panel granny squares.
Then have the right sides facing each other to connect at the shoulders!
After you have down this, connect the sleeve granny squares and lay them on the main body to see how much room you need for the arm hold since the sleeve granny squares are larger than the body. Once you have seen the space needed, close the sides of the body, then connect the sleeves making sure the right side of the sleeve and body are aligning.
Adding The Bandsa
With the 4.0mm crochet hook.
To start the bottom band, connect your yarn to the beginning of the band, and work a row of sc of you need help to see the stitches, if not, you can skip this step.
Ch 9, sc in the back bump of the ch, slst to the first sc of the body to join the row, then slst to the next available sc to start the next row. Back loop sc to make the ribbing band loop. Rep this for the whole band, at the end, do not cut the yarn.
Sc your way around the collar, then back loop sc for the desired number of rows you make for the collar.
If you work a lot of rows, the collar will be folding, if you do not wish for this, then work 4-6 rows of sc.
For the sleeve band, work one row of sc around the sleeve, then for the second row of sc, decrease in every other row, at the end, ch 11, slst for the band. Be sure to slst in the back loop only.
At the end, weave in all the ends, and your crochet daisy granny square cardigan is all done!!!