Crochet cat ears are a fun and adorable accessory that can be worn for a variety of different occasions. Whether you’re dressing up for Halloween, cosplay, or just want to add a touch of whimsy to your everyday look, crochet cat ears are the perfect choice. In this article, we’ll show you how to make your own crochet cat ears in just a few easy steps.
Cat ears crochet supplies
- Yarn (preferably in a cat-ear-appropriate color, such as black, grey, or white)
- Crochet hook (sized to match your yarn)
- Scissors
- Tapestry needle
- Polyester stuffing
- Optional: pins or hair clips for attaching the ears to your head
If you are a lover of crochet cat patterns, then these would be loved by you: crochet cat sweater, crochet cat beanie, crochet cat collar, crochet cat hat and crochet cat scarf.
How to crochet cat ears
Step 1: Make the Base Start by making a magic ring, and then work several single crochets into the ring until it forms a small circle. Pull the tail tight to close the ring, and then work single crochets around the circle for several more rounds. As you work, be sure to stuff the ear with a little bit of polyester stuffing. This will give the ear its shape and prevent it from collapsing.
Step 2: Shape the Ear After several rounds of single crochets, start decreasing the number of stitches in each round to shape the top of the ear. You can use single crochets, half double crochets, or double crochets to achieve the desired shape. The key is to decrease the number of stitches in each round to form a point at the top of the ear.
Step 3: Finish the Ear Once you have reached the desired shape, cut the yarn and weave in the ends with a tapestry needle. Repeat these steps to make a second ear, and then attach the ears to a hair clip or pin if desired.
That’s it! Your crochet cat ears are now ready to wear. Whether you’re going for a cute and whimsical look or a more fearsome feline appearance, these adorable ears are sure to get noticed. So grab your yarn and hook, and start creating your own crochet cat ears today!
Tips to crocheting cat ears
Here are some tips to help you when crocheting cat ears:
- Choose the right yarn: When selecting your yarn, consider the desired look and feel of your cat ears. For a soft and fluffy look, use a fluffy or boucle-style yarn. For a more structured look, choose a worsted weight yarn.
- Experiment with different shapes: There is no one right way to shape cat ears. Try experimenting with different decreases and stitch patterns to create ears that are pointy, rounded, or anywhere in between.
- Don’t overstuff: When stuffing the ears, use just enough stuffing to give them shape and prevent them from collapsing, but don’t overstuff them. Overstuffing can cause the ears to become too stiff and lose their natural shape.
- Attach the ears securely: If you’re attaching the ears to a hair clip or pin, be sure to stitch the ears securely in place. You don’t want them falling off during wear.
- Have fun with color: Cat ears can be made in any color, so don’t be afraid to get creative and try different color combinations. You can even make the ears in a different color for each ear for a fun and playful look.
By following these tips, you’ll be able to create a pair of crochet cat ears that are both adorable and functional. Whether you’re wearing them for a special occasion or just for fun, you’re sure to love your new crochet cat ears!
Stitches & Techniques to crocheting cat ears
To crochet cat ears, you’ll need the following skills and stitches:
- Magic Ring: A magic ring is a way of starting a crochet project in the round. It allows you to pull the tail tight to close the center of the ring, which is helpful when making items like the base of the cat ear.
- Single Crochet Stitch: The single crochet stitch is the most basic stitch in crochet and is used to create a dense and sturdy fabric. It is used in the base of the cat ear to create the initial shape.
- Decreasing Stitches: Decreasing stitches are used to shape the top of the cat ear. To decrease, work two single crochets together in one stitch. This decreases the number of stitches in each round, causing the ear to take on a pointed shape.
- Weaving in Ends: After finishing the cat ears, you’ll need to weave in the ends with a tapestry needle. This helps secure the ends and prevent them from unraveling.
- Optional: Attaching to a Hair Clip or Pin: If you’re attaching the cat ears to a hair clip or pin, you’ll need to stitch the ears securely in place. This can be done using a tapestry needle and matching yarn.
By mastering these skills and stitches, you’ll be able to crochet a pair of adorable cat ears that look and feel great. With a little practice and patience, you’ll be able to create your own custom cat ears in no time!
Easy Crochet cat ear patterns
Crochet cat ear teether
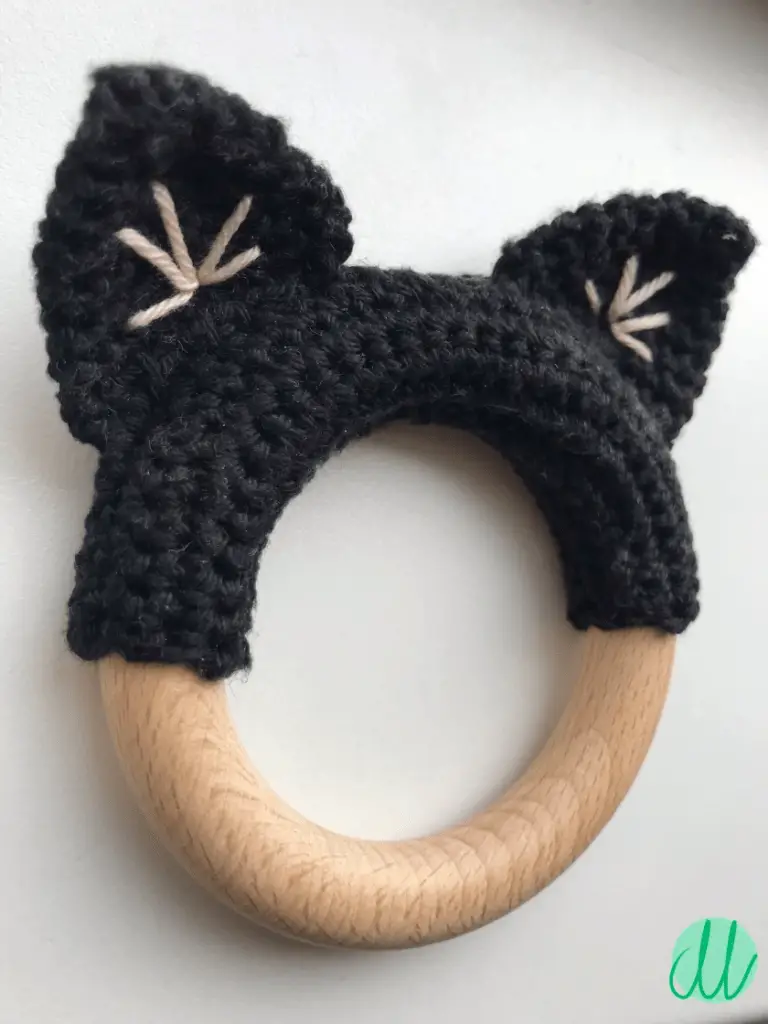
Thinking of making a crochet teething ring? Give this car ear crochet teether ago. Read more...
Cool crochet headband
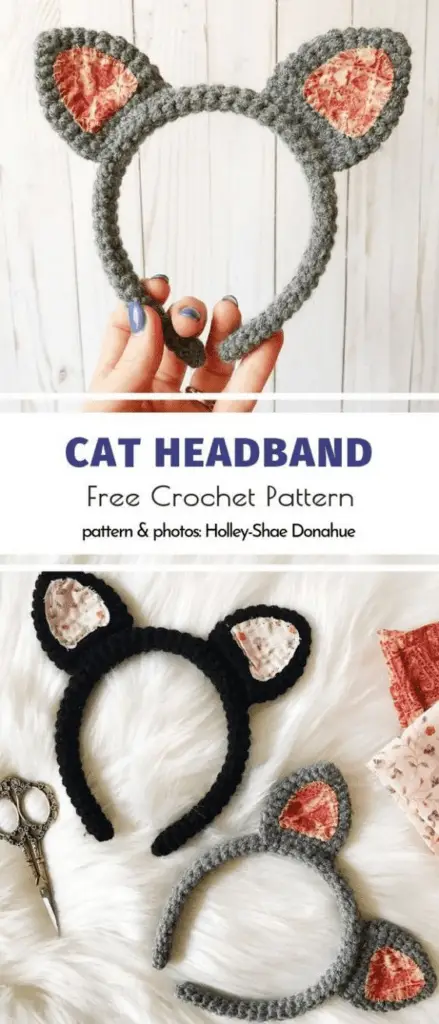
I love these crochet cat ear headbands! They are just so so cute! Love it? Grab the free crochet pattern HERE
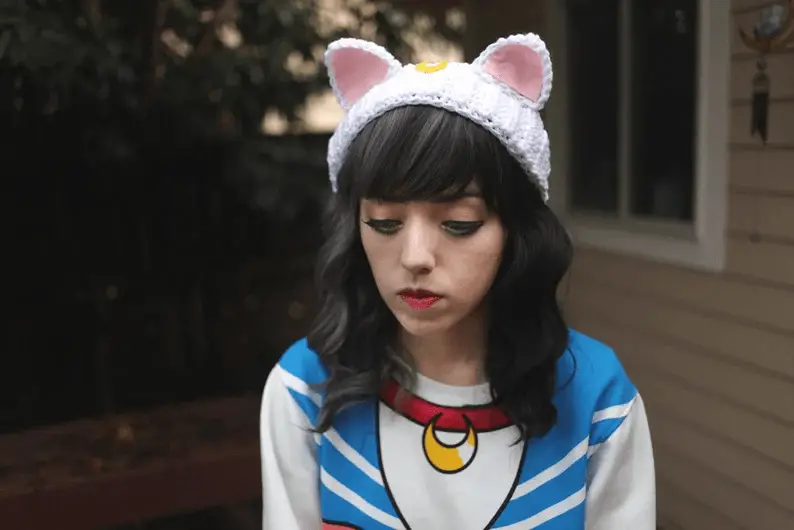
Hello Kitty Crochet Cat Ears
I love this crochet hello kitty head band! If you love it too you can grab the free pattern HERE
Handmade Kitty crochet headband
I could not resist sharing this paid crochet cat ear pattern. Keep your ears warm while looking like your favourite animal! Grab it…
Crochet unicorn cat ears
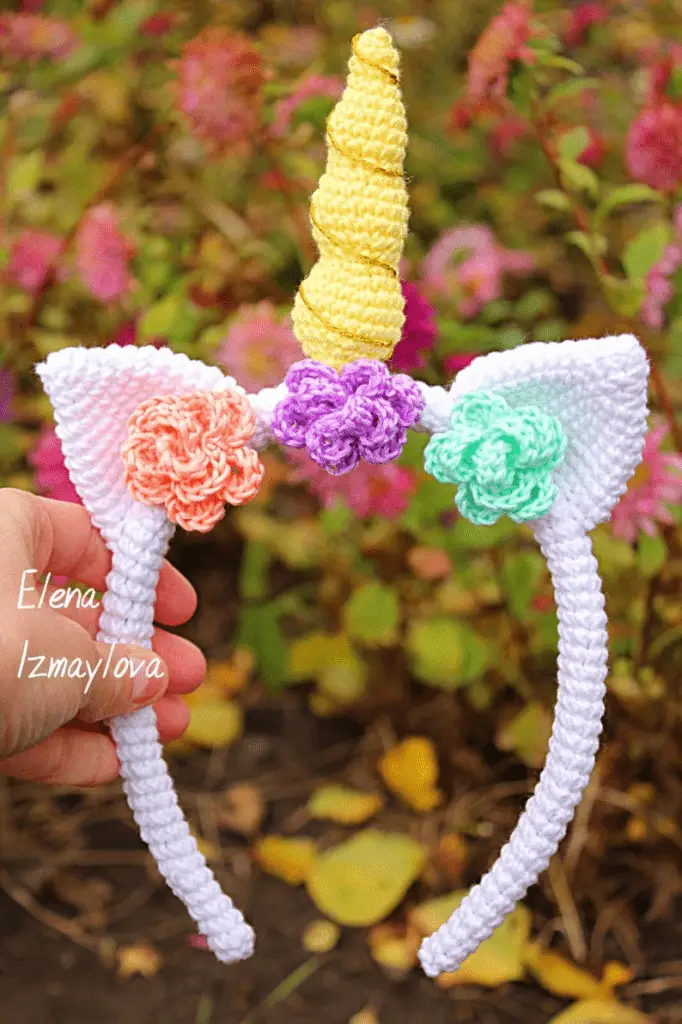
If you love unicorns and cats then grab this crochet car ear/ unicorn pattern HERE
With that, i am done! I know it was not that much, but i tried to keep this post full of free crochet cat ears patterns. I do hope you found the crochet cat ear pattern you loved! If not, then next time!