There is a Printable PDF Pattern available for grabs, incase ads annoy you!! Be sure to share your progress in our FaceBook group which is slowly growing. Be sure you Join, Tag us on Instagram and Pinterest with what’s on your hook of late, you never know who you’re gonna inspire.
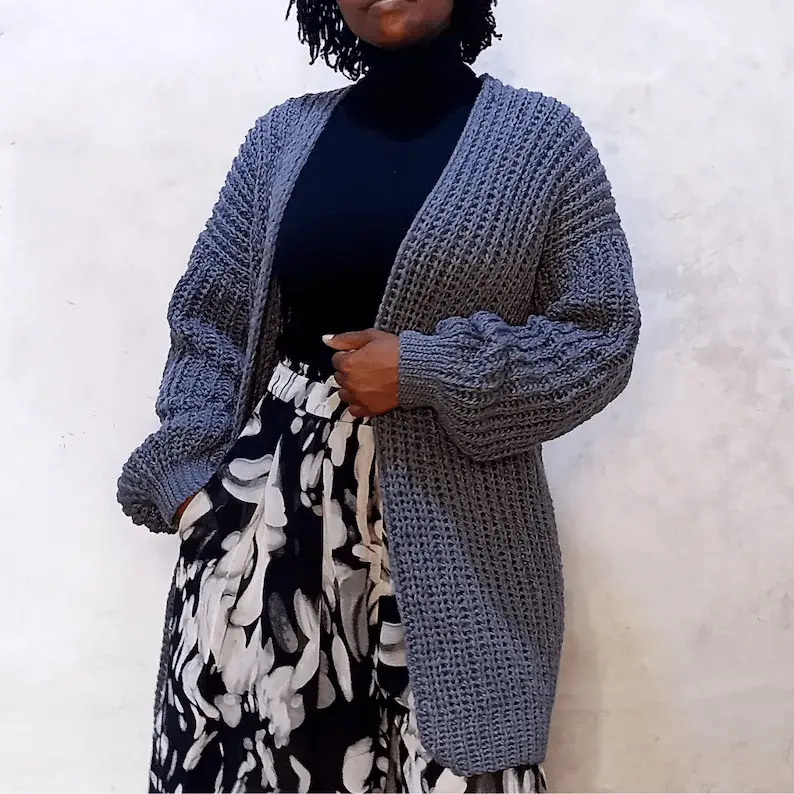
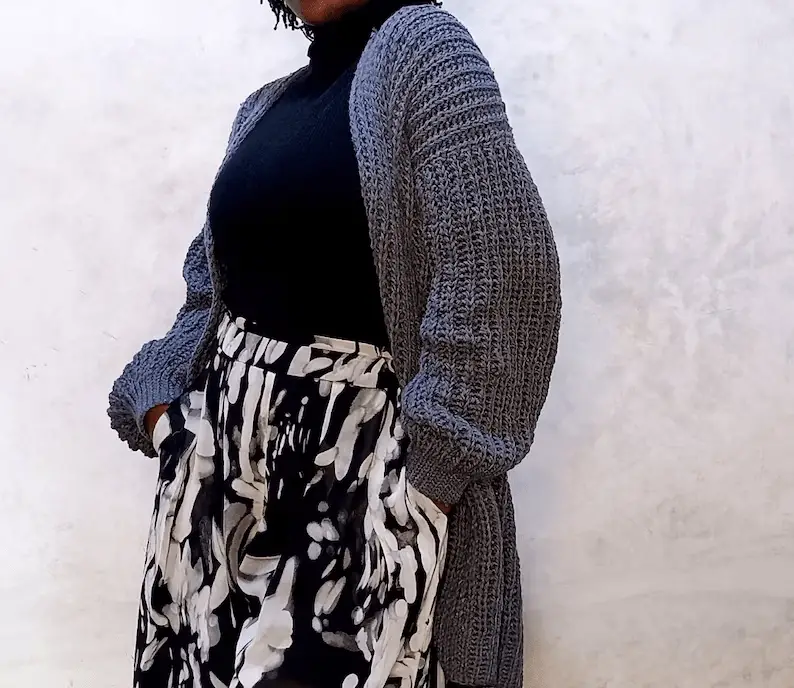
The crochet everyday duster cardigan comes in after the Crochet Everyday sweater, in case you have not seen that one, be sure to check it out. After the crochet every day cardigan was off mu crochet hook, i have not been able to take it off. I must admit, the oversized crochet cardigans are a must have.
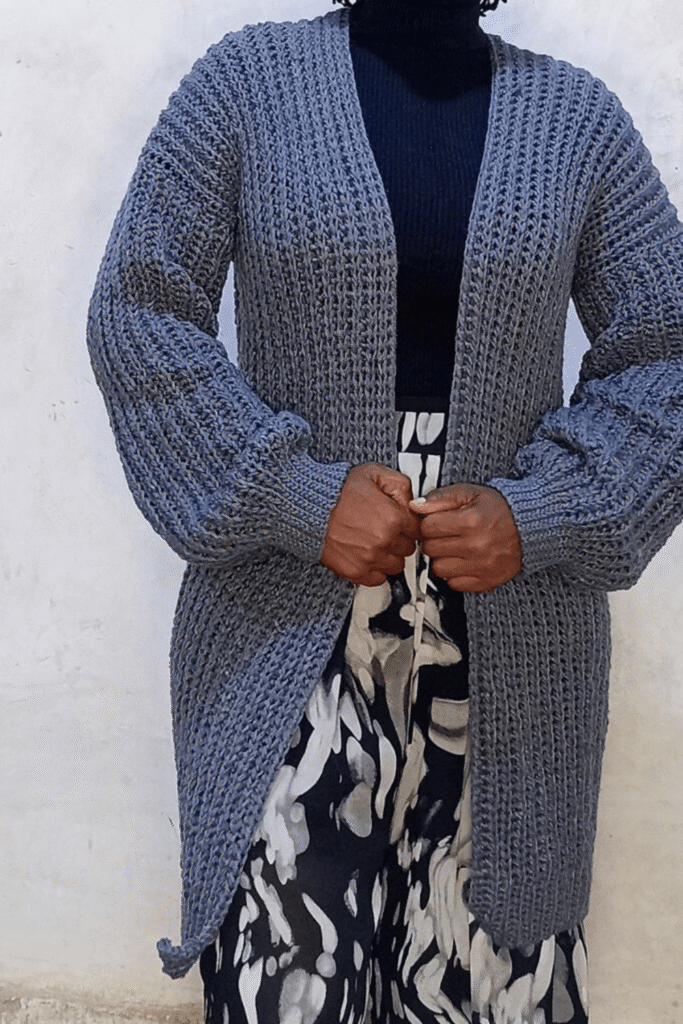
I must admit, the crochet oversized everyday duster cardigan was inspired by the Crochet everyday sweater after my obsession with the Crochet Sunshine cardigan. There is something about this sweaters that just cannot be put in words. Think i’m lying? Give it a shot!!
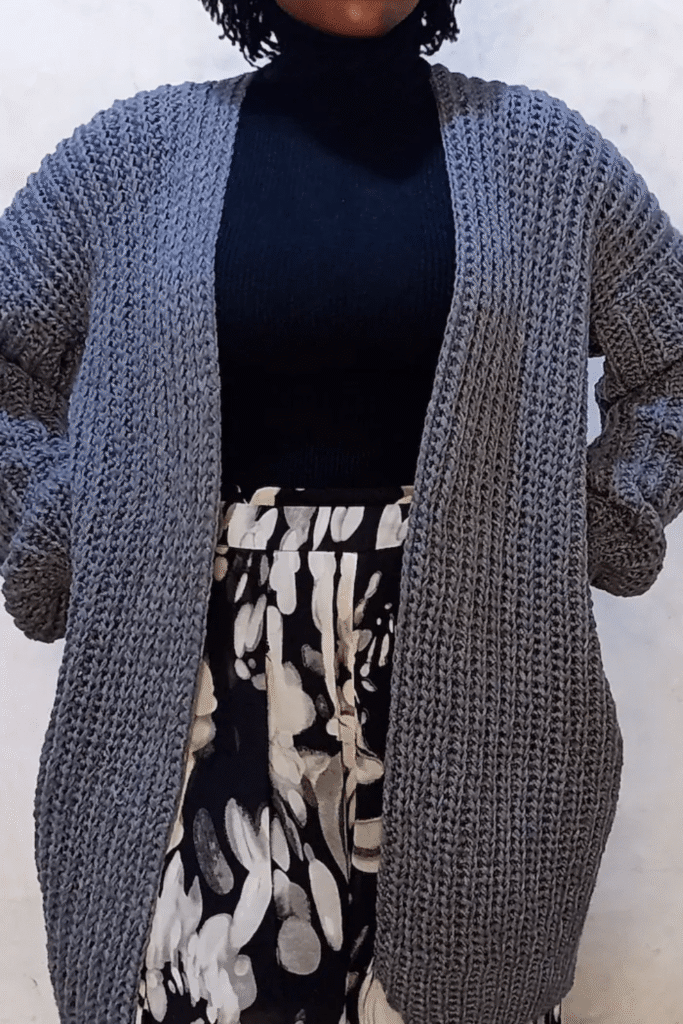
Everyone dreams of comfort, and that is exactly what this crochet oversized duster cardigan will give you. Go on and gift yourself this beautiful piece. Have fun!!!
sizes: XS-L
As you know, this an oversized crochet cardigan so it is only available in 4 sizes.
terminology: US
level of difficulty: Intermediate Beginner
measurements
Finished work Measurement for size S on a 33 inch bust model:
Length :33 inches
Wide: 22 inches
Arm length: 18.5 inches
Arm opening: 7.5 inches
Gauge: 16 stitches in 14 rows 4”X4”
materials
As statedd earlier, this post contains affiliate links, when you purchase, i make a small commission which helps keep the lights on. When you click on thelink, it will not take you directly to the item mentioned but rather the homepage of the company i am affiliated to which allows you to browse around and see something elso you might fancy.
6.00 mm Hook
4.00 mm hook
Stitch marker
Yarn – worsted weight
Scissors
Darning needle
stitch library
-Hdslst- Half Double Slip Stitch
-Ch- Chain
-Bl-Backloop
-St- Stitches
-Rep- Repeat
Sc- Single crochet
-Slst- Slip stitch
amount of yarn needed
8 balls of 100g yarn suitable for 6.00 mm hook for sizes XS & S,
10 balls for size M,
13 balls for L,
good to know!!
The pattern for the cardigan is worked from bottom to the top and not side to side in order to achieve the knit look. Take note that the pattern is worked in the back loop only throughout. The cardigan is worked using half double slip stitch throughout even in the collar, we just change the hook size.
The pictures presented were in size small.
Note that the pattern is only available in 4 sizes since it is oversized.
Note that chaining of one does not count as a stitch. You are beautiful, God loves you.
crochet oversized cardigan construction
Sooo, crochet and me are one, BUT, there are sides to it that i hate, which is the sewing pieces together part, so i do my best to avoid the sewing LOL!
So, this crochet cardigan pattern is worked in one piece, (well, the arms excluded but trust me you will only need your needle to connect the shoulders, close the arms and weave in the ends. This pattern can be worked by a beginner, the only new thing would be the half double slip stitch stitch.
(By the way, if you do not know how to work the half double slip stitch, then i advice to watch the video tutorial as it walks you through it).
It is a very easy pattern because trust me, we use the same stitch throughout with the addition of a single crochet which will be optional and slipstitch to connect the arms to the body.
Just a quick overview of how the crochet cardigan will be brought to life, we will start by making one front pannel which will then be extended to the back panel by chaining the armhole then we will end with the other front panel.
Connecting the shoulders then we will work the arms on the body so we eliminate the sewing LOL. We achieve the ribbed bands by switching crochet hooks, the entire cardigan will be using a 6.00 mm hook, but for the bottom band, arm band and collar, we will switch to a 4.00mm hook. I hope this did not confuse you, if it did, worry not, the pattern will speak sense!
The sizing guide follows size XS(S, M, L, XL, 2XL, 3XL, 4XL,5XL) E.g. “Ch 41(41, 45, 45, 49, 49, 53, 53,… ) means Ch 41 for XS, Ch 41 for Small, Ch 45 for Medium, Ch 45 for Large, Ch 49 for XL, Ch 49for 2XL, Ch 53 for 3XL, Ch 53 for 4XL… etc However, we will only go to the size L in this pattern as it is an oversized crochet pattern.
crochet oversized duster cardigan pattern
Begin by estimating how long you want your cardigan to be by measuring from where you want your cardigan to reach to the top of your shoulder. if you want to make the exact same one as i did, then you can follow the numbers below.
front panel
Foundation chain
To begin, Ch 91(101,111,121)
R1: Using a 4.00 mm hook, hdslst into the first 10 st and place a stitch marker on the 10th stitch. Switch to a 6.00 mm hook and proceed with the hdslst till the top. Ch1 and turn.
R2: Hdslst all the way down witht the 6.00mm hook in the back loop only till you reach the stitch marker, switch to a 4.00 hook for the last 10 st. Ch 1 and turn.
R3: Hdslst into the first 10 st with the 4.00 mm hook up to the stitch marker, the switch to a 6.00mm hook, proceed to hdslst all the way to the top. Repeat rows 1-3 till rows 26(30,38,46) You should end at the bottom of your work.
back panel
Beginning the back panel we should all be at the bottom of our work, start the row as normal with a 4.00 mm hook switching to the 6.00 mm hook after the stitch marker, however, leave a total of 20(25,30,35) stitches unworked at the top and make a chain of 21(26,31,36).
R1: This will be considered row 1 of the back panel. Into the second stitch from the hook, Hdslst all the way down with the 6.00mm hook in the back loop only till you reach the stitch marker, switch to a 4.00 hook for the last 10 st. Ch 1 and turn
R2: Hdslst into the first 10 st with the 4.00 mm hook, switch at the stitch marker to a 6.00mm hook, proceed to hdslst all the way to the top. Repeat rows 1-2till rows 53(61,77,93) This should end your work at the bottom.
other front panel
We will start the next row as normal but however, leave a total of 20(25,30,35) st at the top unworked and make a ch of 21(26,31,36)
Hdslst all the way down with the 6.00mm hook in the back loop only till you reach the stitch marker, switch to a 4.00 hook for the last 10 st. Ch 1 and turn. Repeat this till rows 26(30,38,46) ch1 and cut.
Fold the cardigan so the front panels lay on the back panel to sew together. Sew the shoulders together neatly.
sleeves (make 2)
To begin working in the arms, go around the arm hole with a row of single crochet(optional as it is easier to see the stitches, but if you can see them without the single crochet row then skip this phase), connect the yarn to the underarm of the cardigan and ch 51(61,71,81)
hdslst with a 4.00mm hook the first 10 stitches placing a stitch marker and proceeding with a 6.00 mm hook.
when you reach the under arm portion, connect to the next st /single crochet st with a slip stitch to join the row, slst to the next st/single crochet st to begin a new row.
hdsldt in the back loop only. repeat this till the whole arm is complete then sew the arm to close it. Repeat with the other side.
To work the color, we will only be using the 4.00 mm hook for this part. This part is optional but I recommend it for absolute beginners.
connect your yarn and Work a row of single crochet around the collar area of the cardigan to make the stitches more visible. Note, for the midsection we did on the back panel, place 1 single crochet into each hdslst row.
At the end of your single crochet row assuming you did not skip this row, Ch 1 and hdslst all the way around, when you reach the end, ch1 and turn.
The thickness of your color is optional, so work as many rows as you wish, as for me, i worked 6 rows. At the end, chain 1 and cut. Weave in all the ends, and your Everyday Cardigan is all DONE!!!
Loved this crochet oversize duster cardigan free pattern? Be sure to let us know in the comment what you thought about it. If you did not, be sure to let us know where we can improve next time. Until then, happy crafting. God loves you xox.