I had been seeing a lot of knit fisherman cardigans around but never really a crochet fisherman cardigan, i am hoping mine is the first of many to come.
If you do not want to deal with Ads, the Purchase the PDF Pattern HERE. For the free crochet pattern, scroll down below.
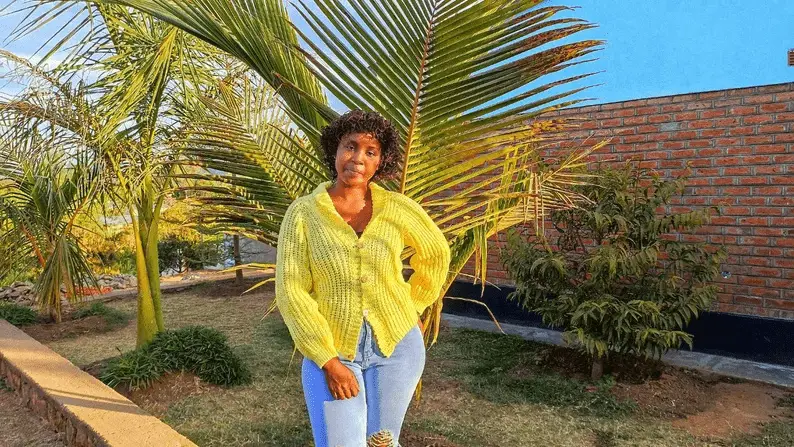
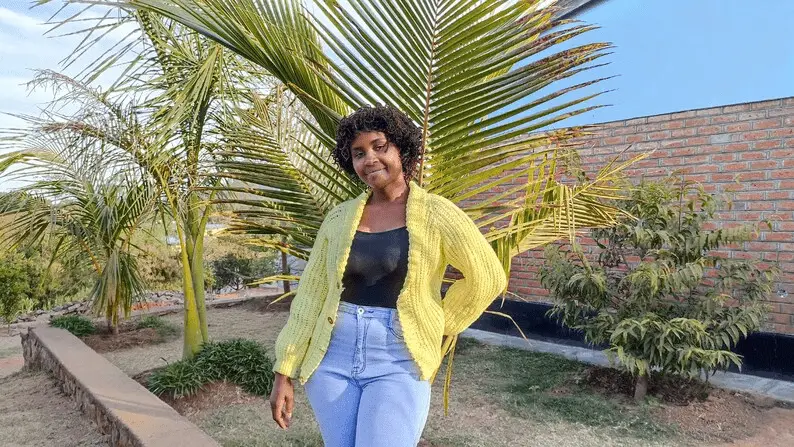
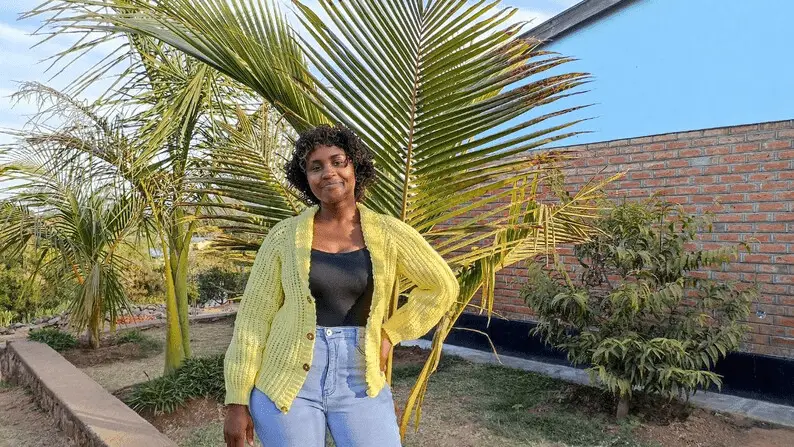
This crochet fisherman cardigan can be worm by both men and women. I know there is not a lot of crochet men cardigans or even sweaters, i have a few crochet sweaters for men that can be worn by both men and women.
This fisherman cardigan might as well be a men’s crochet cardigan.
Easy Crochet Fisherman Cardigan
If you have come across my Easy Crochet Knit-look cardigan pattern, then you will be no stranger to this women and men’s crochet cardigan. The construction of them both are the exact same, the difference comes in when we start to work on the collar.
The satisfaction that came after this crochet fisherman cardigan was complete is hard to explain, you are gonna have to make your own to feel it too.
Inspiration
This fisherman cardigan was inspired by my love for knitting. I cannot knit, (yet). I think knitting is complicated, but then, i used to think the same abut crocheting, but look at me now, 3 years later.
So the goal for next year is to learn to knit.
The knit and crochet fisherman designs are just beautiful. I really wanted to learn how to make my own, so i sat down and thought how to make a crochet version of a fisherman cardigan, and here we are.

New To Crocheting?
Take crochet classes with me where we cover in depth how to crochet different types of garments. You can join for a free month and get 4 Free crochet PDF patterns. Join HERE
Best Yarn For A Crochet Cardigan
When it comes to the perfect yarn for crochet garments, i hear a lot of crocheters say they prefer acrylic yarn.
Worsted weight yarn works very fast, and that is why i love it. Mary maxim has lovely and affordable yarn in case you need some for a project or this project.
If you would like to know the number of yarn balls you need to purchase for your size, then keep reading.
Crochet Cardigan Sizing Guide
Gauge:
17 stitches in 13 rows = 4X4
Sizes:
9 sizes from SX-5XL
Terminology :
US Terms
Skill level:
Intermediate beginner
Bust Measurement
| Sweater Size | Bust Size (inches) |
| XS | 32-33 in 81-84 cm |
| S | 34-35 in 86-89 cm |
| M | 36-37 in 91-94 cm |
| L | 38-39 in 96-99 cm |
| XL | 40-42 in 112-117 cm |
| 2XL | 44-46 in 114cm |
| 3XL | 48-50 in 122-127cm |
| 4XL | 52-54″inch |
| 5XL | 56-58 inches |
Easy Crochet Fisherman Cardigan
Pattern Notes:
- Ch 1 does not count as a stitch
- If you want your cardigan longer, chain more
Stitch Library
Ch- Chain
Sc- Single crochet
hdslst- half double slip stitch
Slst- Slip stitch
Rep- Repeat
Materials
Amount of Yarn needled:
I was using 100g balls of worsted weight yarn which is 230 yards.
XS- 4 balls of yarn
S- 4.5 balls of yarn
M- 5.5 balls of yarn
L- 6.5 balls of yarn
XL- 7.5 balls of yarn
2XL- 8.5 balls of yarn
3XL- 9.5 balls of yarn
4XL- 10 balls of yarn
5XL 11 balls of yarn
CROCHET FISHERMAN CARDIGAN FREE PATTERN
Finally, the crochet fisherman cardigan free pattern
front panel
R1: with your 5.00 mm crochet hook, ch: 66(76,86,96,106,116,126,136,146)
In the second ch from the hook, place a decr by hdslst 2 chains tog, hdslst going down but leave 15 ch un-worked. Hdslst the 15 ch with a 3.5 mm hook. ( Be sure to place a stitch marker at the top of your row 1).
R2: Ch1, turn. Still with the 3.5 mm hook. Hdslst into the first 15st blo!!
At the stitch marker switch to the 5.00 mm hook and finish the row, placing another decrease at the top of your work.
Rep row 1-2 decreasing at the top of your work and in the blo till row 17(23,29,29,35,41,41,47,53)
You should end at the bottom of your work. Be sure to place a stitch marker at the top of your last decrease row so we do not miss it.
back panel
Start your next row as normal, at the top of the work,place an incr by placing 2 hdslst in the last st
Increase till row 17(23,29,29,35,41,41,47,53). You should end at the top of your work.
Place a stitch marker at the last row of your increase.
Work 17(23,29,29,35,41,41,47,53) normal rows. So you will not increase or decrease for these rows. Place a stitch marker on the top of the last normal row. You should have ended at the bottom of your work.
Now we start rows of decrease again.
Decr 17,23,29,29,35,41,41,47,53) rows remembering to leave a stitch marker at the top of your last row. You should have ended at the top of your work.
To start the last incr row which is back to the front panel now,
Ch 1 hdslst 2 into the first ch from hook to count as your first incr or you can ch 2 hdsldt into the second ch from the hook and that can count as your first incr.
Incr till row 17(23,29,29,35,41,41,47,53) Your work should have ended at the bottom. DO NOT CUT THE YARN
COLLAR
Place stitch marker in the 42(47,52,57,62,67,72,77,82) stitch from the bottom. Place another one in the 16(21,26,31,36,41,46,51,56) stitch from the previous stitch marker. DO THIS FOR BOTH SIDES OF THE COLLAR
The first stitch marker is where we will work the normal collar rows, the the second stitch marker is where we will stop increasing the collar, we will go around the neck of the cardigan to the next collar where we will start to decrease to the last stitch marker where we will go back to working the normal sc rows.
So with your stitch marker still attached to the bottom of your work ch 6, sc in the back bumps only, slst to connect to the collar, slst to start a new row, back loop slst to make the ribbed collar appearance. Rep this till the first stitch marker.
At this stitch marker we will start to increase We will incr by placing two sc in the first stitch, the one where we connect the collar to the body. Note that we do not increase in every row, we increase in every other row.
SO you will increase one row, work the next row normally, then increase the one after that.
Rep increasing till the next stitch marker. Work normal rows till the next stitch marker on the other side of the collar, when you reach that stitch marker, start to decrease.
Decrease in every other row at the base of the collar (where we connect the collar to the body). When you get to the next stitch marker, work normal rows of 5 sc.
But before we go anyfurther, locate where you want your buttons to be, and place button holes (ch 1 and skp 1 stitch) accordingly.
SLEEVES
Connect your yarn where you left the stitch marker which should be where your decrease and increase meet or your underarm section.
Place a sc in the first st and replace the st marker, place a sc in each hdslst row all the way around your arm opening slst to join in the first sc you made.
We still need the st marker, so remember the chains we made at the top of the shoulders? place the st marker in the middle of those ch. So you will place the st marker in the st number 2(2,3,3,4,4,5,5,6)
To start on the sleeve, ch 58(62,66,66,70,74,74,78,82) in the first 10 ch, with the 3.5 mm crochet hook place 10 slst leaving a marker on the 10th st, and switch to the 5.00 crochet hook and cont with the hdslst In the last ch of the sleeve, place 2 hdslst as an incr. slst to join the row in the next available sc, and slst in the next sc to start on the next row. one turn
Place 2 hdslst in the first ch to mark as an incr and work the rest of the ch as normal remembering to slst in the last 10 st eith the 3.5 mm crochet hook.
Cont to incr your sleeve till you reach the st marker we left at the shoulder as that should be half way through your sleeve meaning we should now start to decr.
To start the decr, work hdslst in 2 st tog. Rep this till your sleeve is complete, sew the sleeve close with your yarn needle.
Rep this for the other sleeve,
Your crochet cardigan is all done!!!